 Navigating IoTeX on Galxe
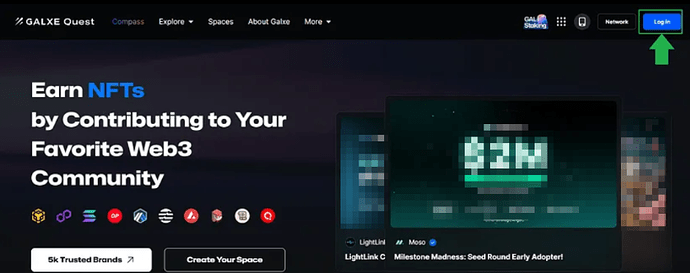
Step 1: Go to Galxe: Galxe - Your Web3 Community is Waiting and click ‘Login’
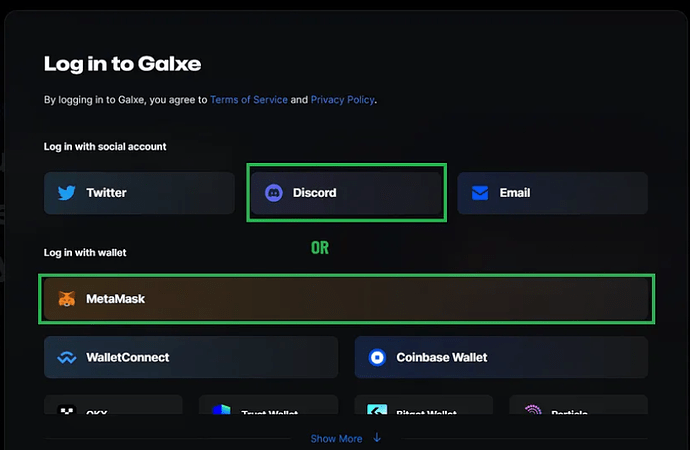
Step 2: Click “Connect Wallet.” Choose your Web3 wallet (e.g., MetaMask, Trust Wallet) continue by following the prompts to connect.
Step 3: Click “Sign in with Discord” to authorize sign in using your Discord account.
Next Go To: Get Goated Season 1 - IoTeX DePIN Massive Airdrop by IoTeX Network | Galxe
OR
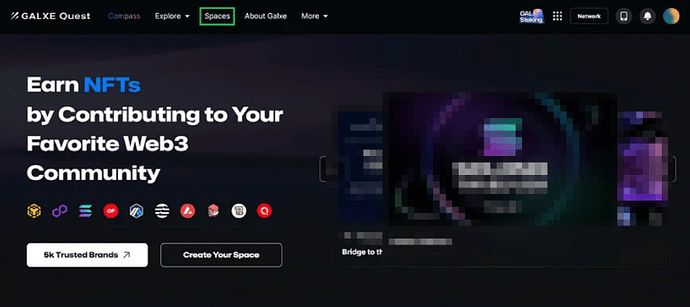
Search for IoTeX under the Spaces tab outlined in the photo.
 IoTeX Off-Chain Tasks
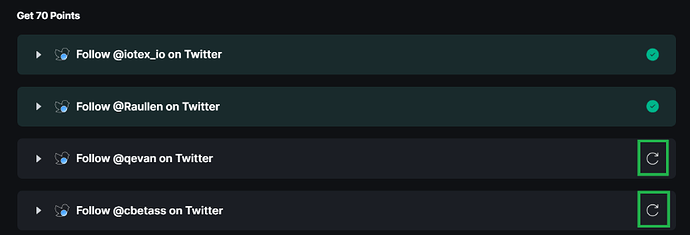
Step 1: Follow the Team on X to validate and claim points.
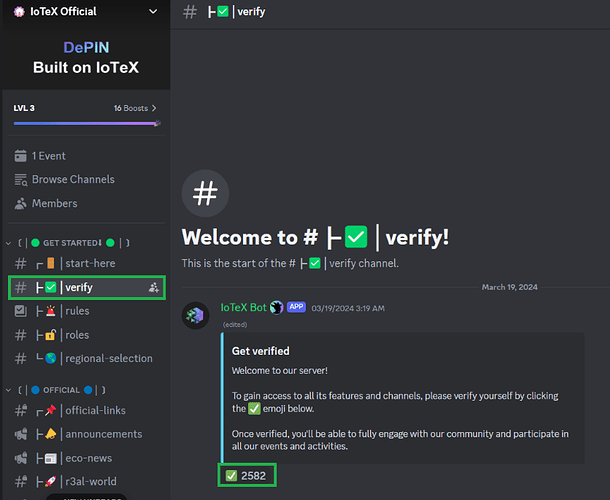
Step 2: Get the Young Goat role by reacting to the ![]() emoji in the #Verify Channel in the IoTeX Discord server.
emoji in the #Verify Channel in the IoTeX Discord server.
Join IoTeX Discord
Validate on Galxe after getting the role.
Step 3: Get the Happy Goat role by leveling up to level 5 on our Discord and engaging in high-quality conversations. ( This can take several days.)
Validate on Galxe after getting the role.
Step 4: Join the IoTeX Group on Telegram
Validate on Galxe after getting the role.
Step 5: Answer the quiz questions correctly to validate and proceed to the next step.
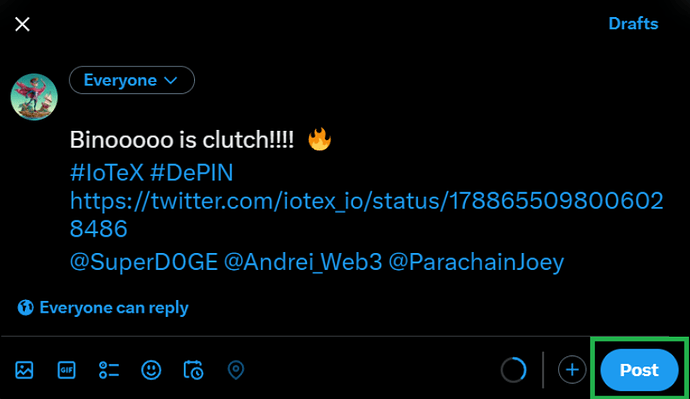
Step 6: Quote retweet, add hashtags #IoTeX and #DePIN, and tag 3 friends to validate this task.
Validate on Galxe after completing
Step 7: Visit the page to validate the next step.
Validate on Galxe after completing
 Download & Activate ioPay
ioPay is the official wallet for the IoTeX Network. You can use it to interact with the IoTeX blockchain to send/receive IOTX, sign transactions, execute smart contracts, stake/vote for Delegates, interact with applications, and much more.
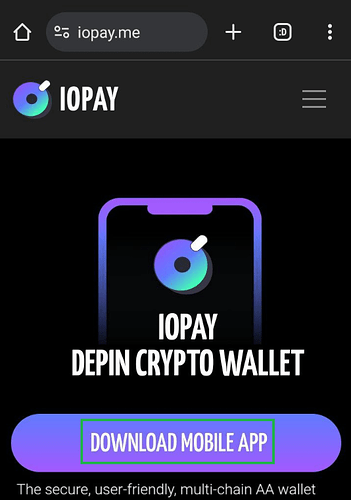
Step 1: Visit the ioPay website and click on ‘Download Mobile App’ https://iopay.me/
Step 2: Click on ‘Download on Google Play or Apple Store’. Alternatively, you can scan the QR code. This will direct you to the Play Store, where you can download the app. After Downloading, open your wallet.
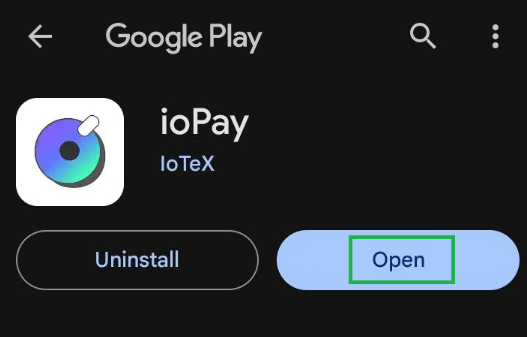
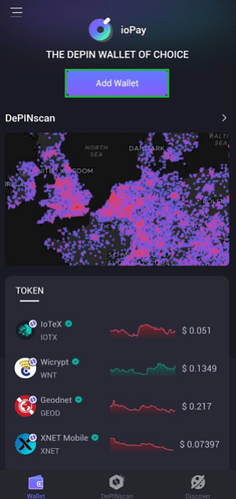
Step 3: Click on ‘Get Started’ and confirm the terms and conditions. Then proceed to add your wallet.
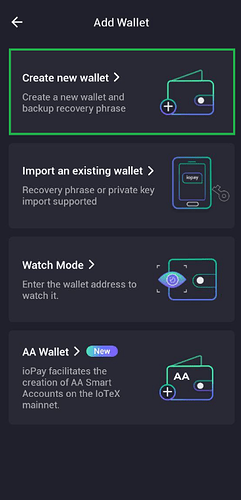
Step 4: Click on create a new wallet. Name your wallet and create a password for it.
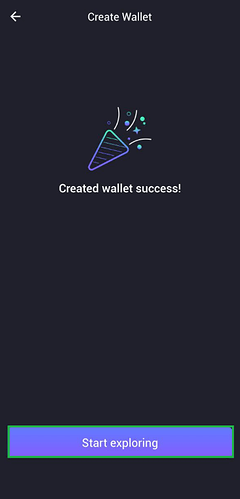
Step 5: Write down Your Recovery Phrase and click next. Add the recovery phrase words in the correct order to Verify and then click confirm.
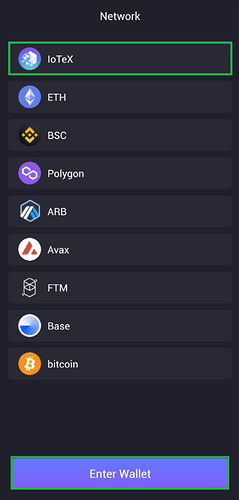
Step 6: Select IoTeX as your preferred network and click on ‘Enter Wallet’.
You have now successfully set up your ioPay wallet. Take the time to go through the tour
 Complete 1 On-Chain interaction on IoTeX
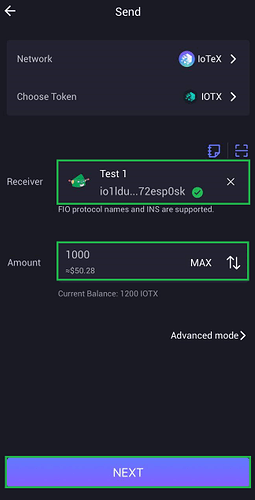
Step 1: On your IoPay wallet’s home page, click on ‘send’
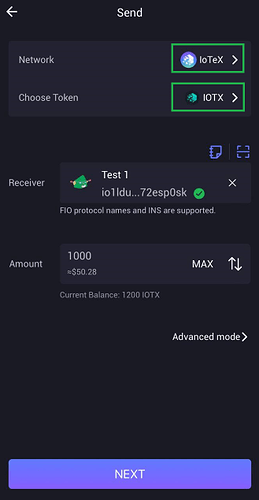
Step 2: Select the Network/Choose token to be IoTeX and IOTX respectively
Step 3: Enter the recipient’s address in the “Receiver” field and the amount of IOTX you wish to send.
Click on Next
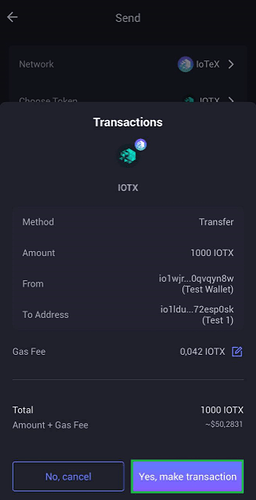
Step 4: Review the transaction details and confirm the transaction.
Make sure you leave some IOTX for gas
Step 5: Wait for the transaction to be processed and confirmed on the blockchain.
Step 6: Validate on Galxe
 Stake 1000 $IOTX
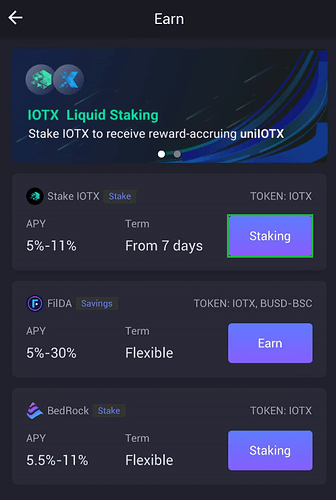
Step 1: On your IoPay wallet’s home page, Click on ‘Earn’
Step 2: Browse the list of available validators and select one by clicking on ‘staking’
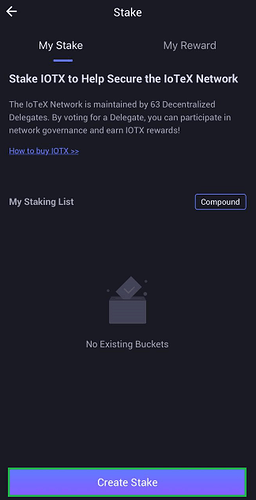
Step 3: Click ‘Create Stake’
Step 4: Choose ‘Native Staking’
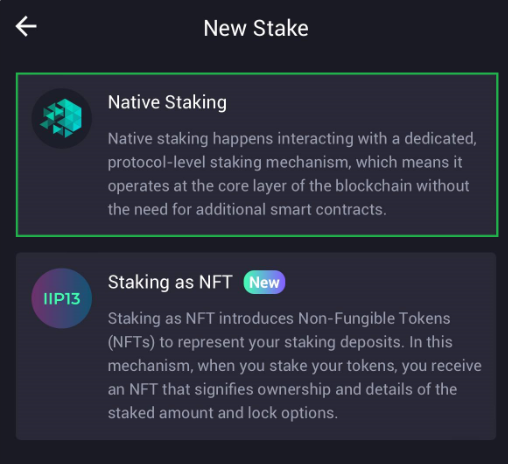
Step 5: Choose a delegate, preferably from the top 36 delegates. Avoid Binance and Unifi protocol as they don’t reward stakers. Click on “Next” at the top right of your screen.
Step 6: Enter the amount of IOTX tokens you want to stake and click ‘Next’
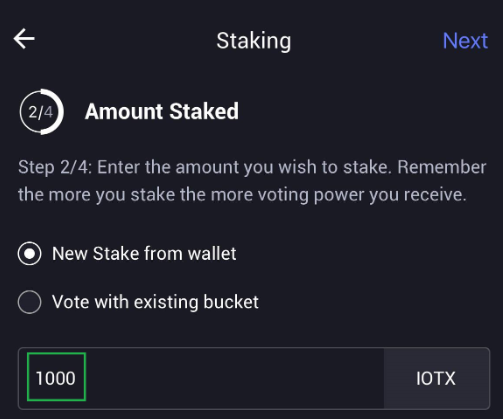
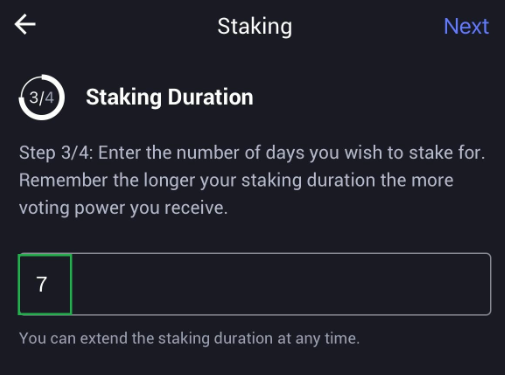
Step 7: Select the stake duration
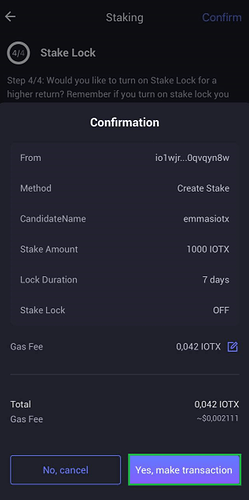
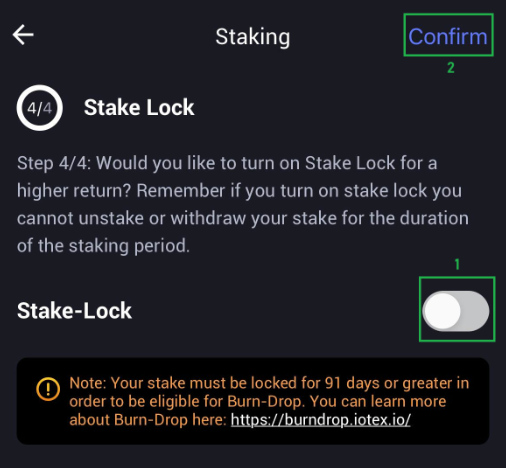
Step 8: Toggle on the stake lock option if you wish to gain more rewards and click on ‘Confirm’
Step 9: Click ‘Yes, make transaction’ and you’re done
Step 10: After completing the transaction, Click on the ‘Earn’ tab, then “Native,” and you will see your staking bucket.
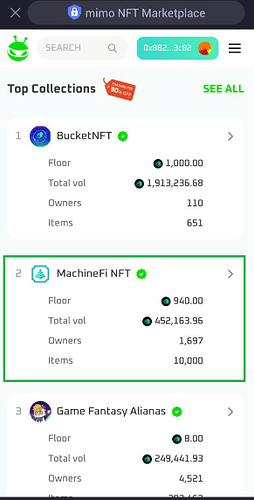
 How to Purchase MachineFi NFT
MachineFi NFTs are core NFTs for the IoTeX community and can be easily purchased or sold on Mimo using the following contract addresses:
IoTeX: io1p3dtqfkhf3z3xa4y0xp59f595r5e5klwwnrex7
Ethereum: 0x0c5ab026d74c451376a4798342a685a0e99a5bee
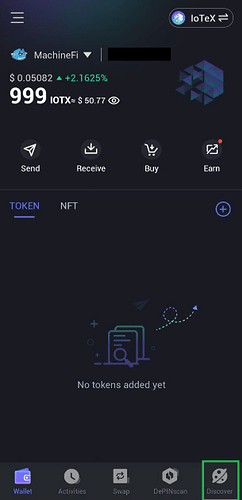
Step 1: Log in to your IoPay wallet and click on the Discover icon.
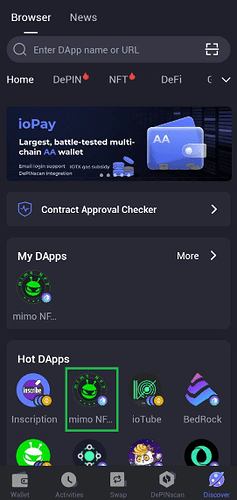
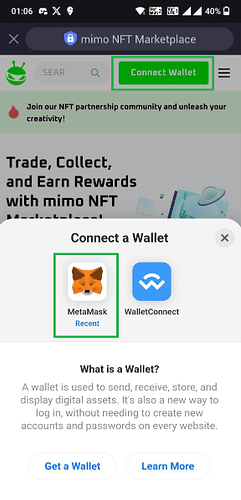
Step 2: Click on MimoNFT to access Mimo and connect your wallet. Select MetaMask, which is compatible with IoPay. After signing in, authorize the request.
Step 3: Scroll down or search for ‘MachineFi NFT’ with a verified tag, and select it.
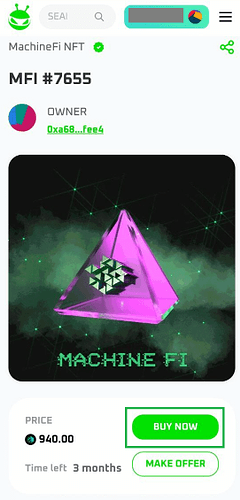
Step 4: Scroll to find the NFT you want, and click ‘buy now’
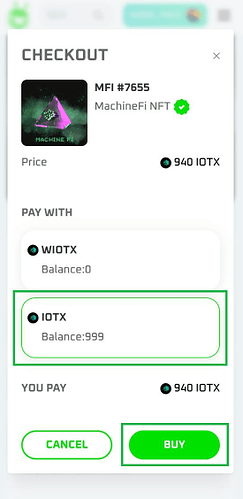
Step 5: Select IoTeX as your preferred mode of payment and click on Buy. Confirm the transaction and authenticate with your password.
Done!
 Hold Vita Token
If you hold VITA tokens, please validate. All stakers can claim VITA every 25 hours, so you can either claim it by staking IOTX or buy it on Mimo.
 Discord Roles
Discord roles signify member status (newbie, veteran, etc.), team affiliation (moderator, staff), and overall server hierarchy. Higher roles often grant additional permissions and benefits.
Role Definition
-
Young Goat: New member to the server.
-
Gamer Goat: You want to be notified of all engagement activities done on the server.
-
Happy Goat: You are an active member of the Discord server.
-
Money Making Goat: You’ve opted to receive notifications about new opportunities to earn rewards through our ecosystem partners.
-
OG Goats: You’ve been in the IoTeX community for a long time, or you are noticeably passionate about IoTeX.
-
Server Booster: You boost the server.

