IoTeX Studio is the IoTeX web IDE to easily build and deploy smart contracts on the IoTeX Blockchain, you can use it directly in your browser at: https://ide.iotex.io. In this thread we will go through a step by step tutorial from editing to deploying and test of an example contract
Contents:
- The Contract
- Create a new File
- Compile the contract
- Verify compilation errors
- Select the network to deploy to
- Deploy the Contract
- Interact with the contract
- Conclusions

1 The contract
As a test contract for this tutorial, we will use the Simple Open Auction from Solidity 5 official documentation.
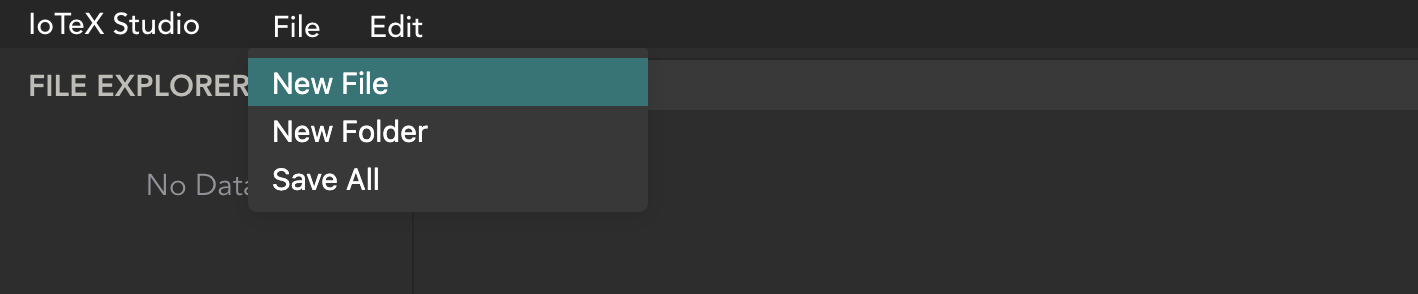
2 Create a new file
First, lets create a new empty file for our contract by clicking [File → New File] menu item:
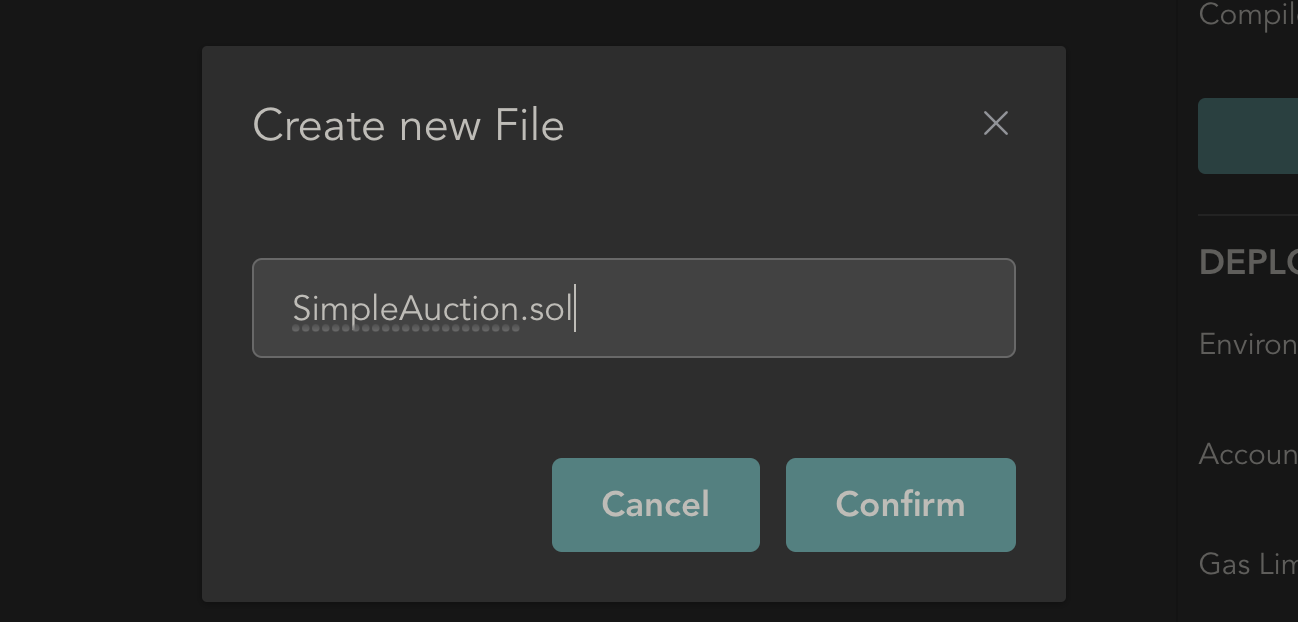
we will name our new file SimpleAuction.sol:
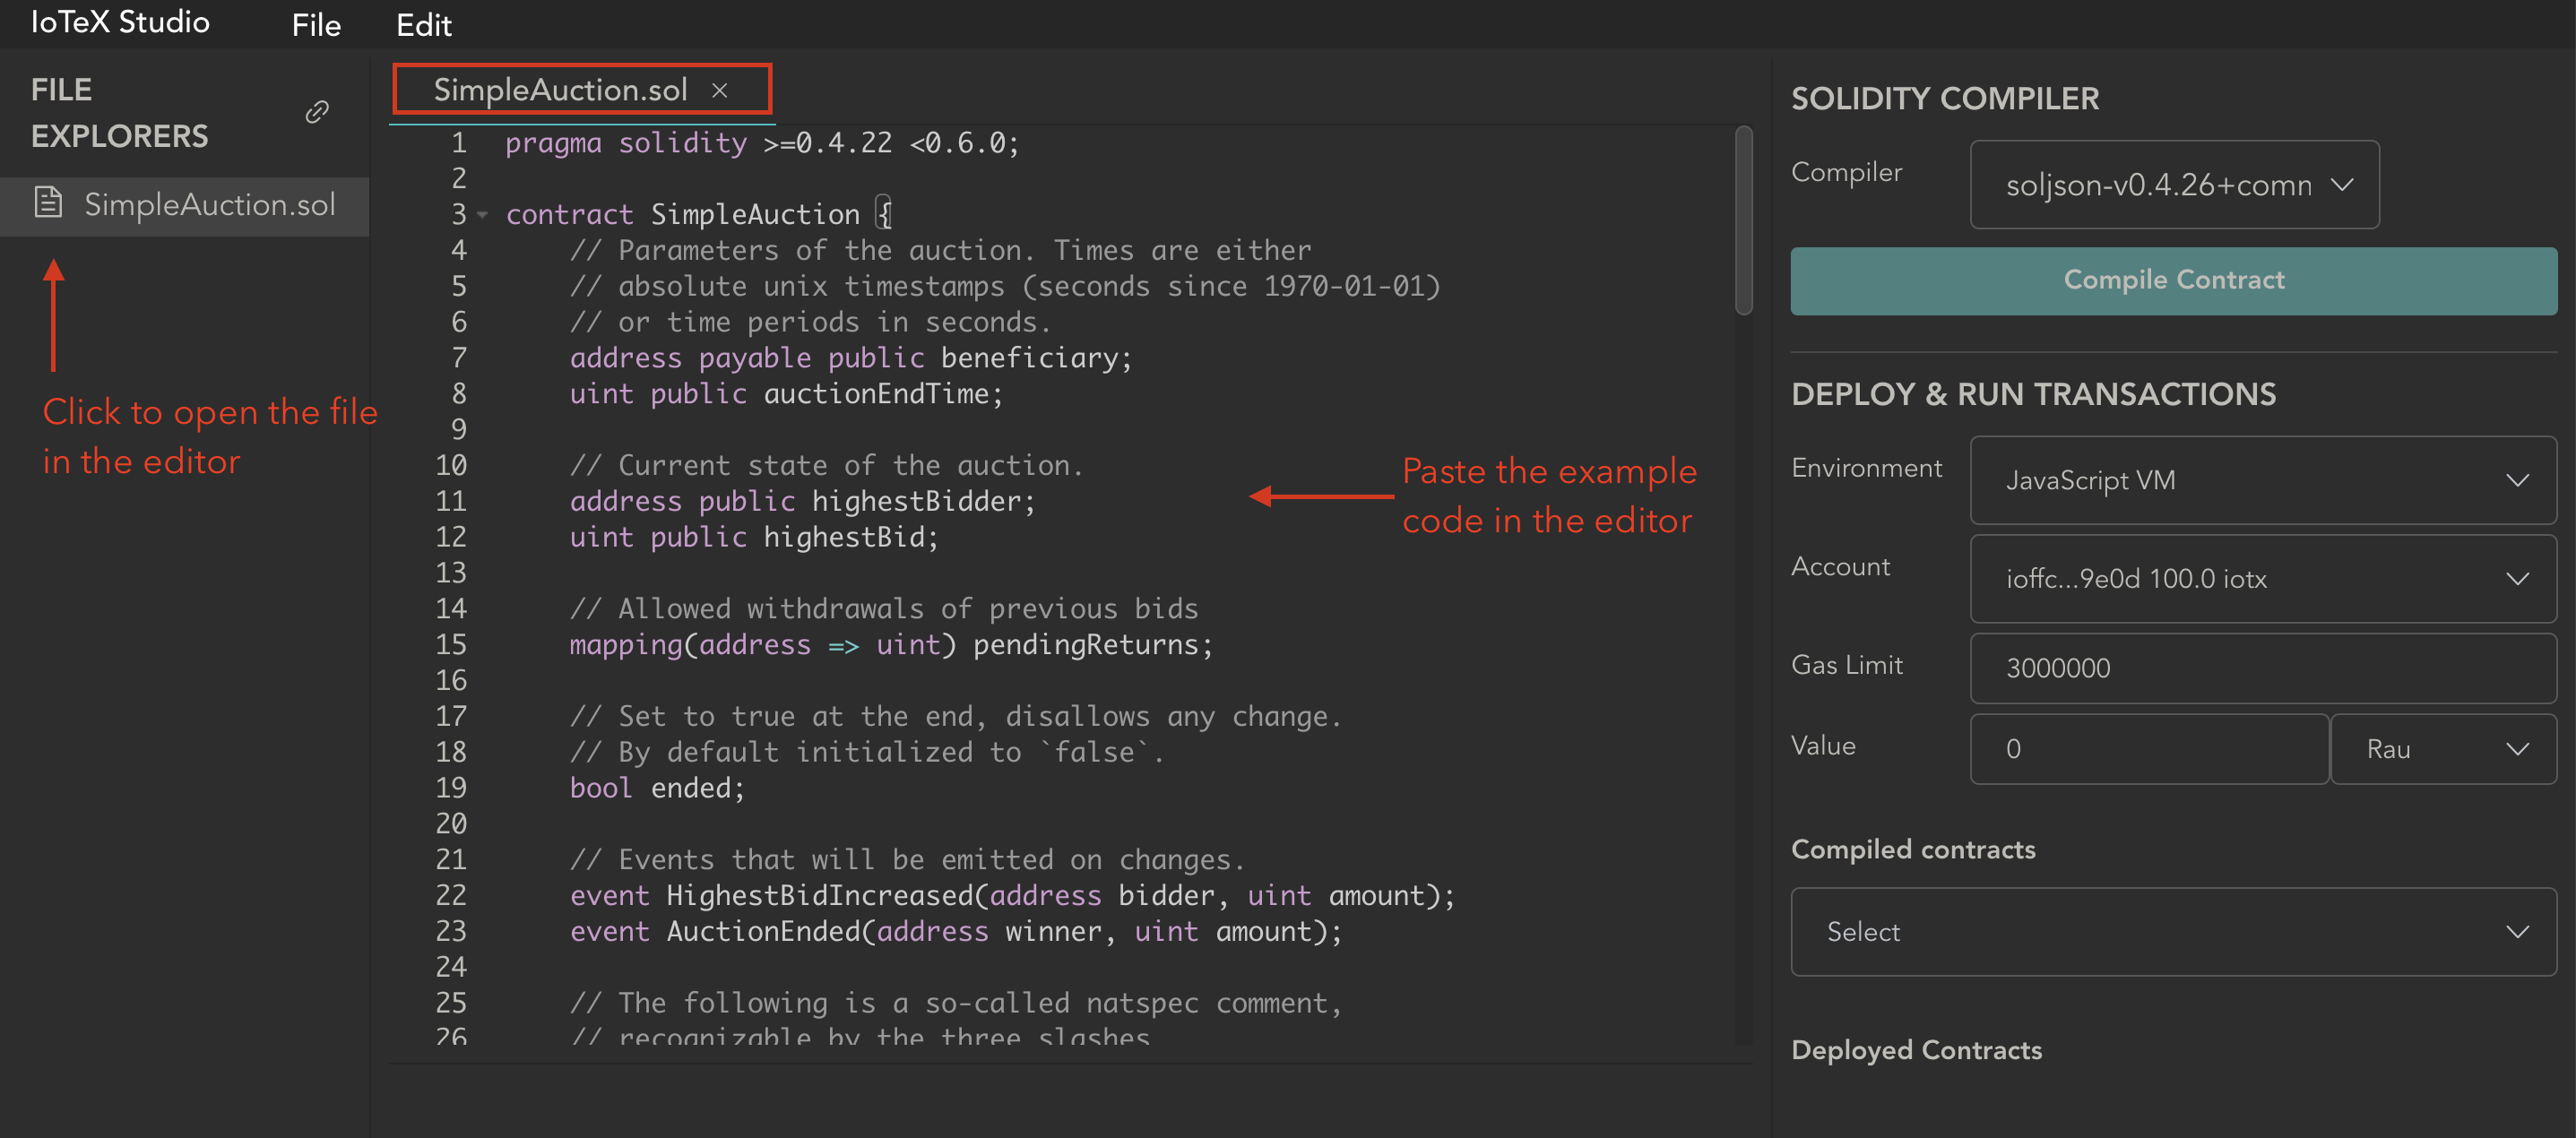
-
Click the file name in the files browser panel to open it in the editor
-
Copy the example code from Ethereum docs
-
Paste the code in the editor:
3 Compile the contract
This contract requires a Solidity compiler version number greater than, or equal to v0.4.22 (and lower than v0.6.0), so make sure v0.5.13 is selected as the compiler in the SOLIDITY COMPILER section in the right panel of the IDE, then just click the Compile Contract button to compile the code:
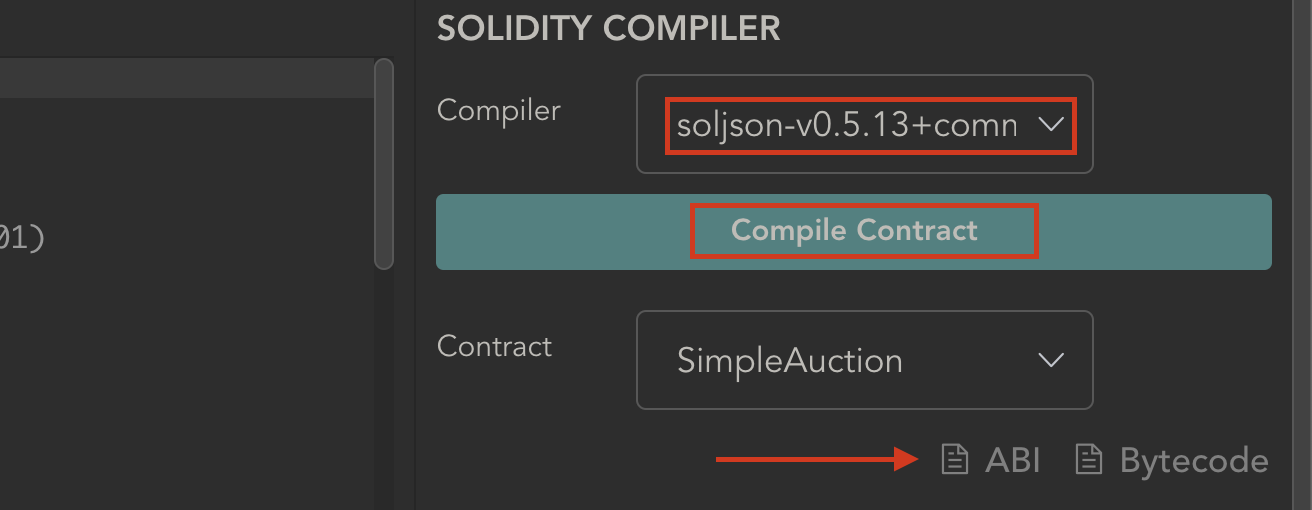
Compiling the contract conveniently provides you with the ABI and Bytecode for the contract, that you may want to include in another software, or in your ioctl client scripts: simply click the ABI or Bytecode links to copy either one to the clipboard if you need it!
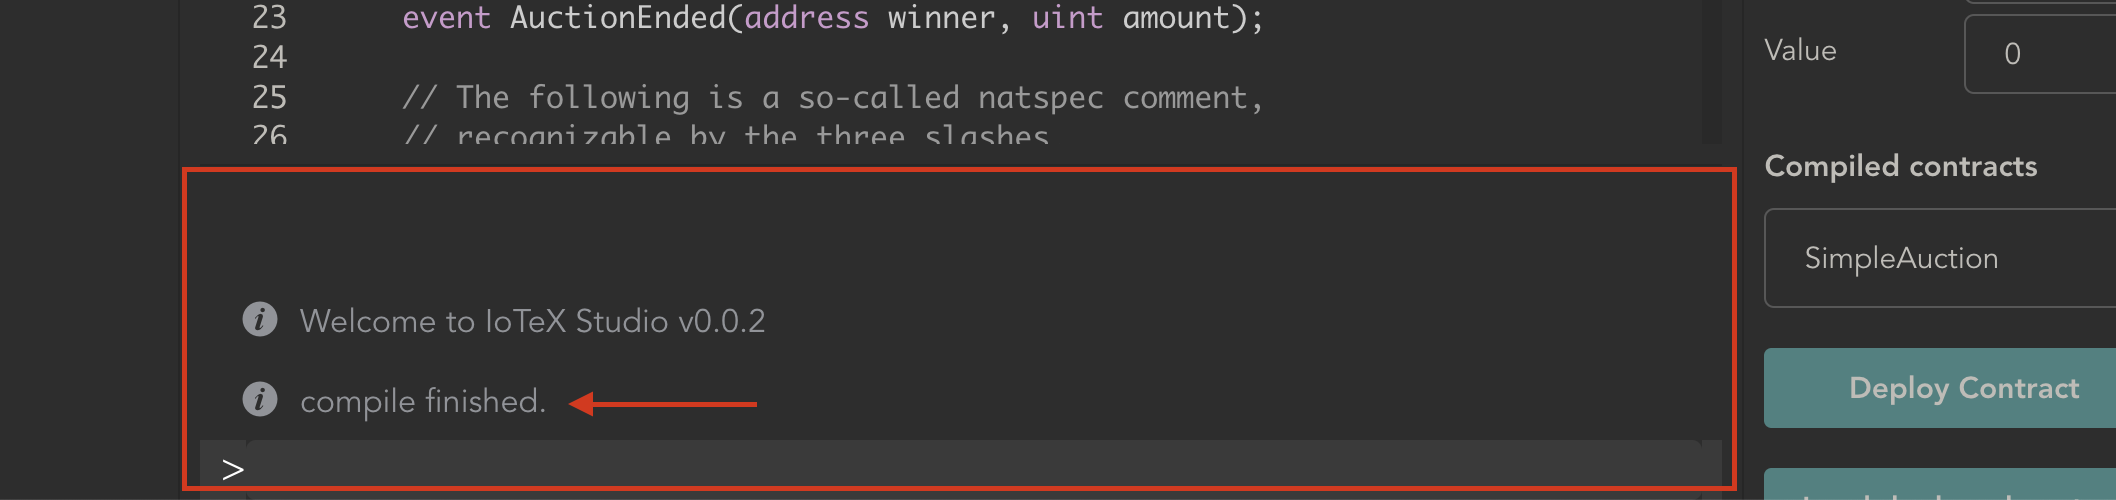
4 Verify compilation errors
The example code used in this tutorial should be correct and is supposed to compile without errors. In any case, wether you edited the code, or you are compiling a different contract, or if you chose the wrong compiler, you can always check the output of the compilation process in the output panel at the bottom of the IDE:
5 Select the network to deploy to
Before deploying the contract to the IoTeX mainnet, you have different choices to test the code first.
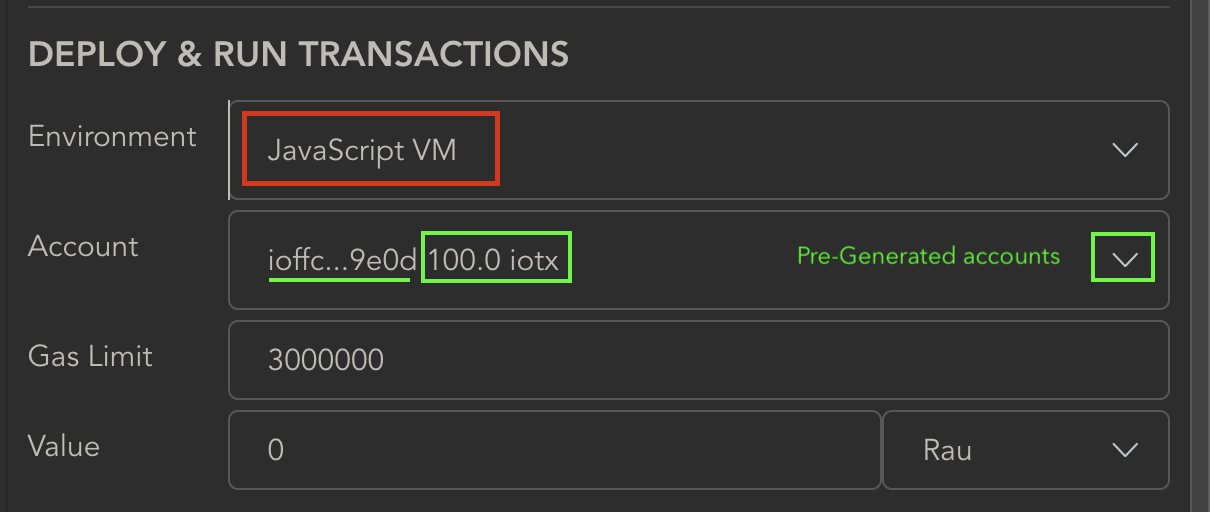
5.1 Deploy to the IDE Virtual Machine
The easiest way to deploy the contract if you just want to test it, is to deploy it to the Javascript Ethereum VM, that is embedded in the IDE itself: this is the default option in the DEPLOY & RUN TRANSACTIONS panel, for the environment field. This choice also provides you with a set of pre-generated IoTeX accounts, each one with an initial balance of 100 IOTX (you can switch accounts in the Account field) for you to flexibly test the contract.
5.1 Deploy to the IoTeX Blockchain
If you want to test your contract by deploying it to an actual IoTeX Blockchain, then you need the ioPay Wallet App (Desktop) opened and unlocked on n address that contains some IOTX (needed for transactions gas):
-
Open ioPay Desktop and unlock your wallet
-
In ioPay, select either Mainnet or Testnet depending on which network you want to deploy the contract to:
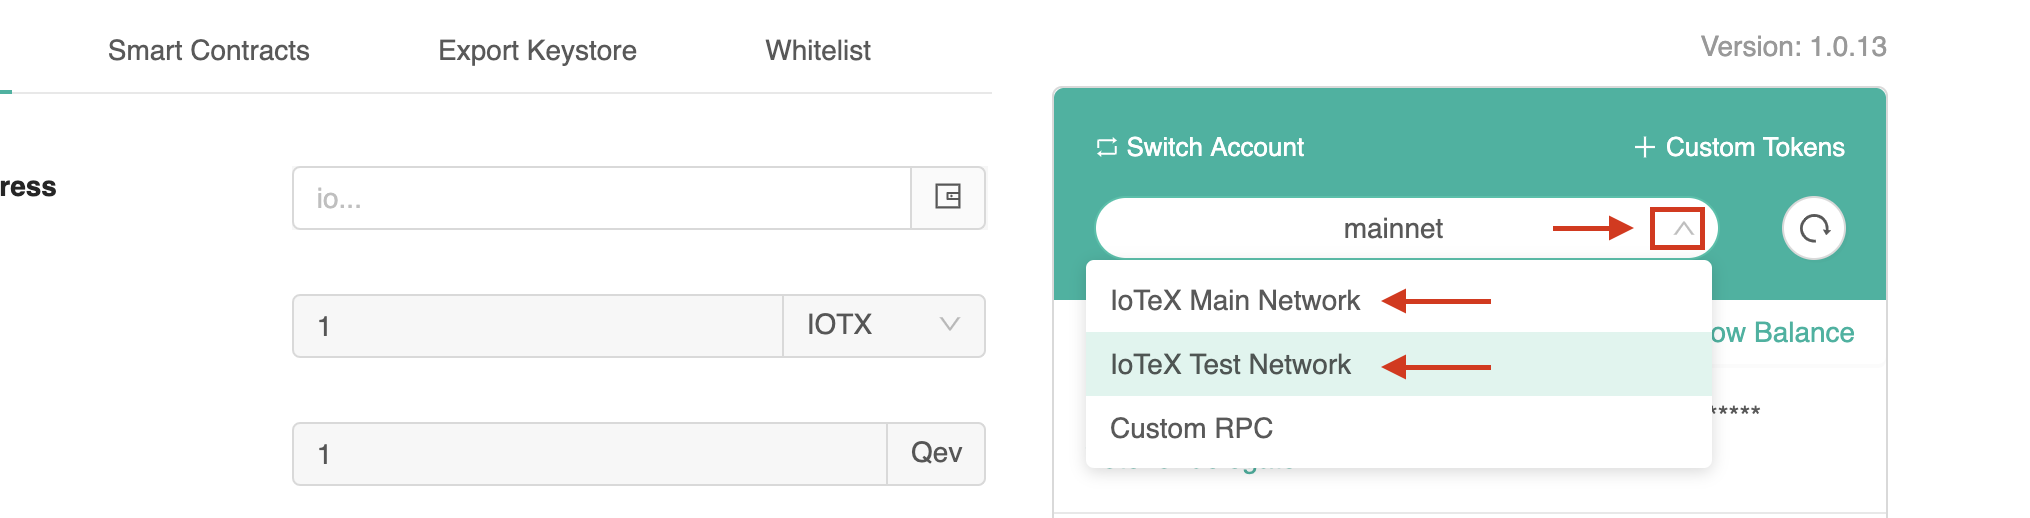
-
Verify that you have some IOTX in the wallet balance after you selected the network (in case you need testnet-IOTX tokens, you can get some here: https://docs.iotex.io/developer/more/faucets.html)
-
In IoTeX Studio IDE, the Environment field must be set to Deploy via ioPay (Desktop):
-
You will notice that the IDE is now connected to your ioPay account, showing your wallet address:

6 Deploy the contract
The constructor for the contract used in this tutorial expects 2 arguments: _biddingTime, which is the duration in seconds of the auction, and _beneficiary, the address of the auction beneficiary:

therefore, we must set these two arguments in order to correctly deploy the contract:
- locate the Deploy Contract button in the right panel, and expand it to show constructor arguments:

-
Set 3600 for the
_biddingTimeargument and input an IoTeX address for the_beneficiaryargument: -
click Transact to deploy the contract

-
if you are deploying to an IoTeX blockchain, ioPay should pop up for you to confirm the transaction (please allow for 5-10 seconds for the transaction to be confirmed by the blockchain)
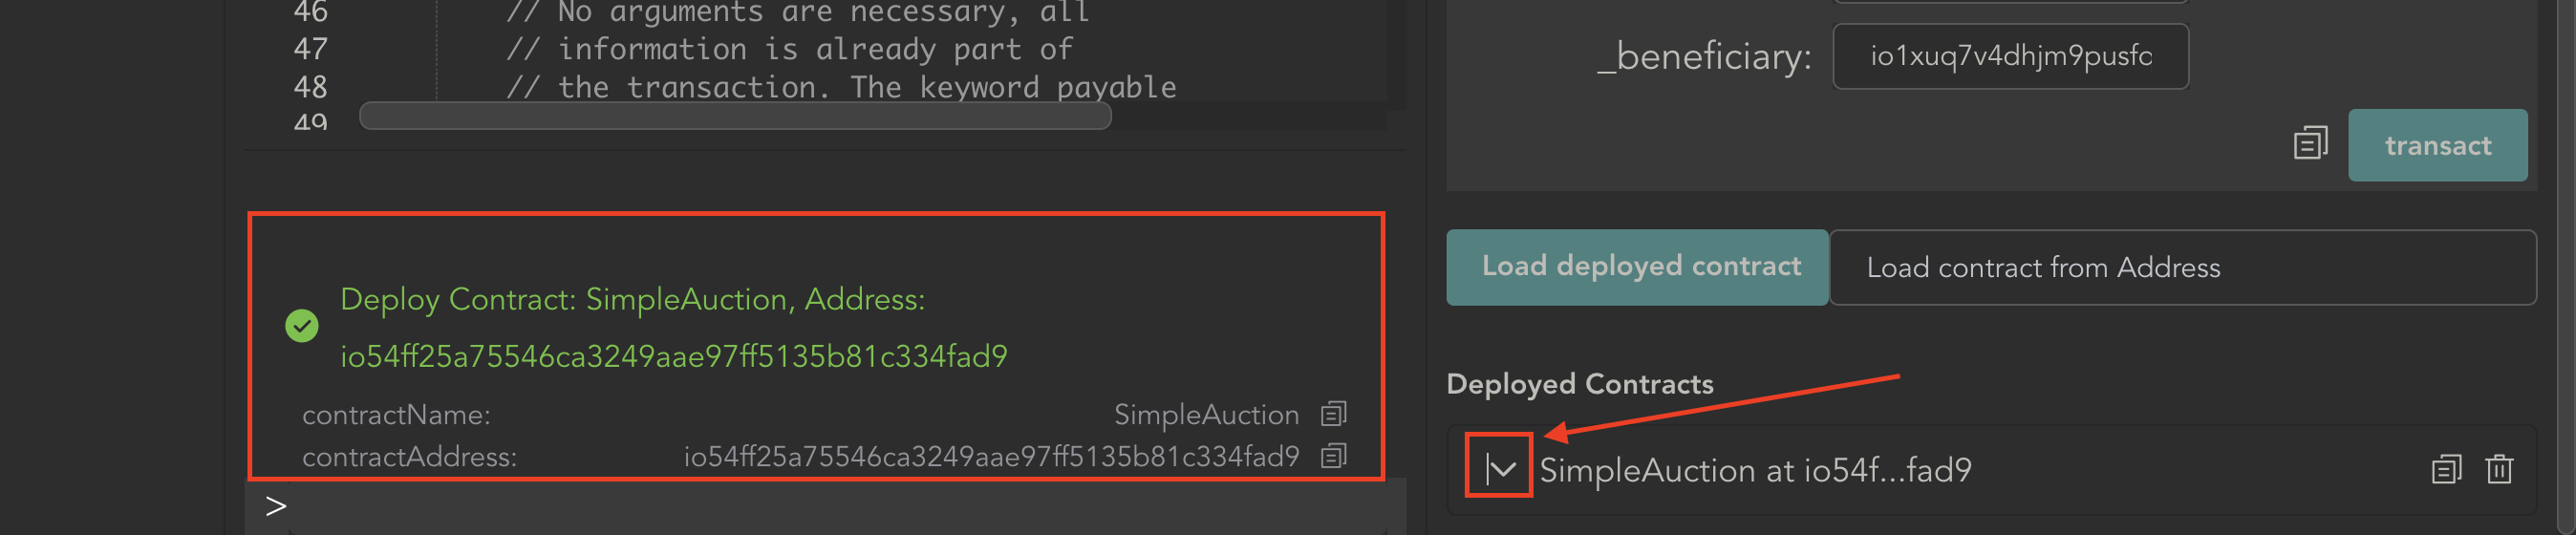
-
check the newly deployed contract address in the output panel:
7 Interact with the contract
Excellent! Now that your contract is deployed, you can interact with it directly from the IDE and test all the functions before deploying the final release to the mainnet! Alternatively, if you already deployed that same contract to the blockchain, you can use the Load deployed contract button to interact with it at a later time (you still need to compile the code in the IDE to generate the ABI first!).
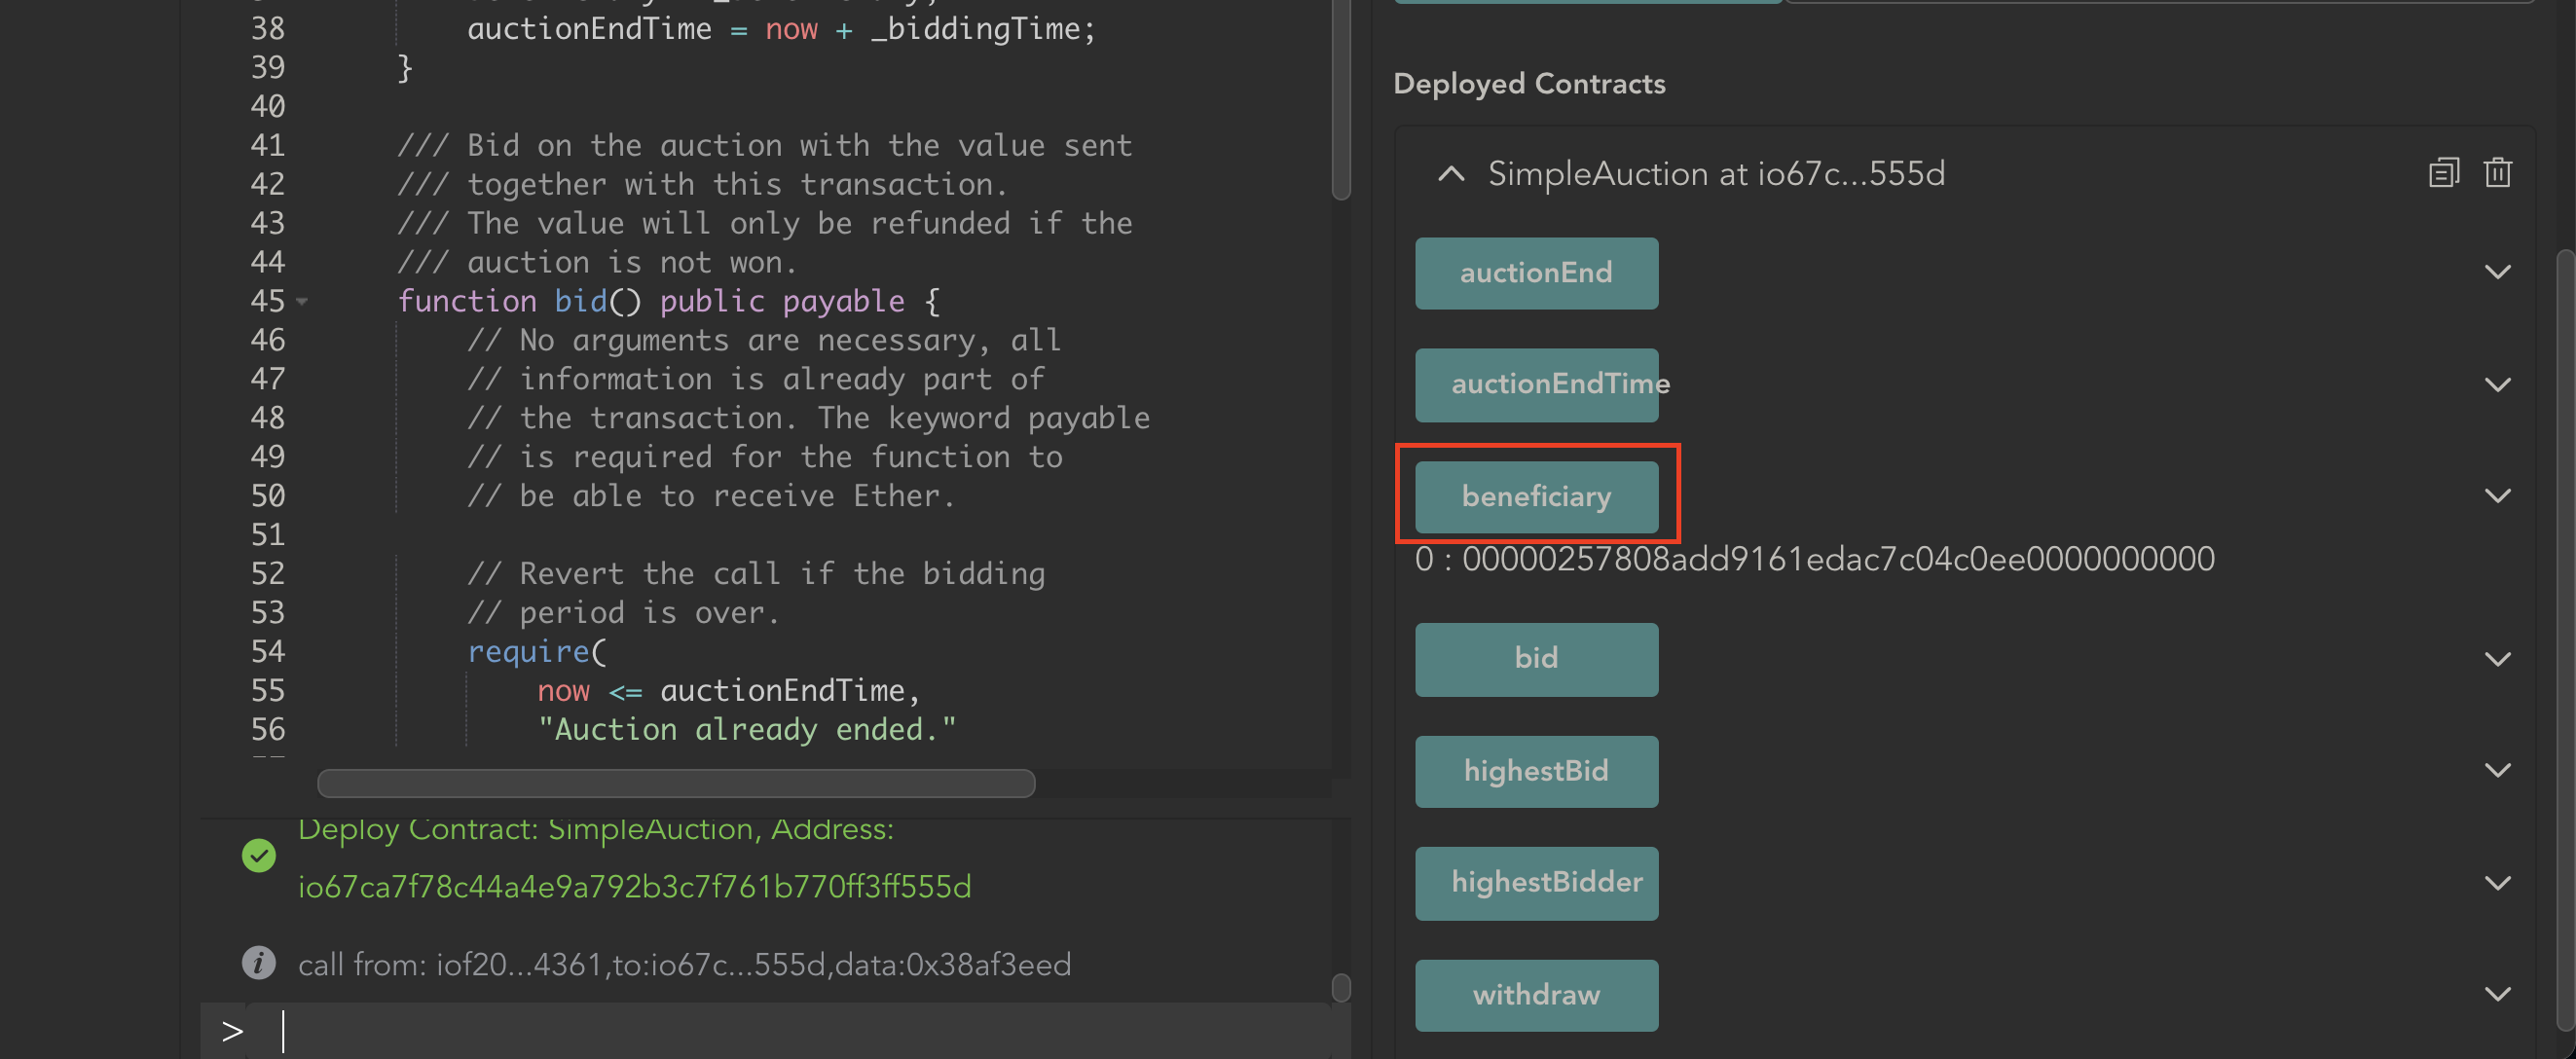
In the previous picture, notice that SimpleAuction contract is listed under the Deployed Contracts panel on the right:
- Expand the SimpleAuction deployed contract and notice that there are buttons available to read all the public fields, and to call all the public methods of the contract: for example, if you click the Beneficiary button you will get the value of the beneficiary address:
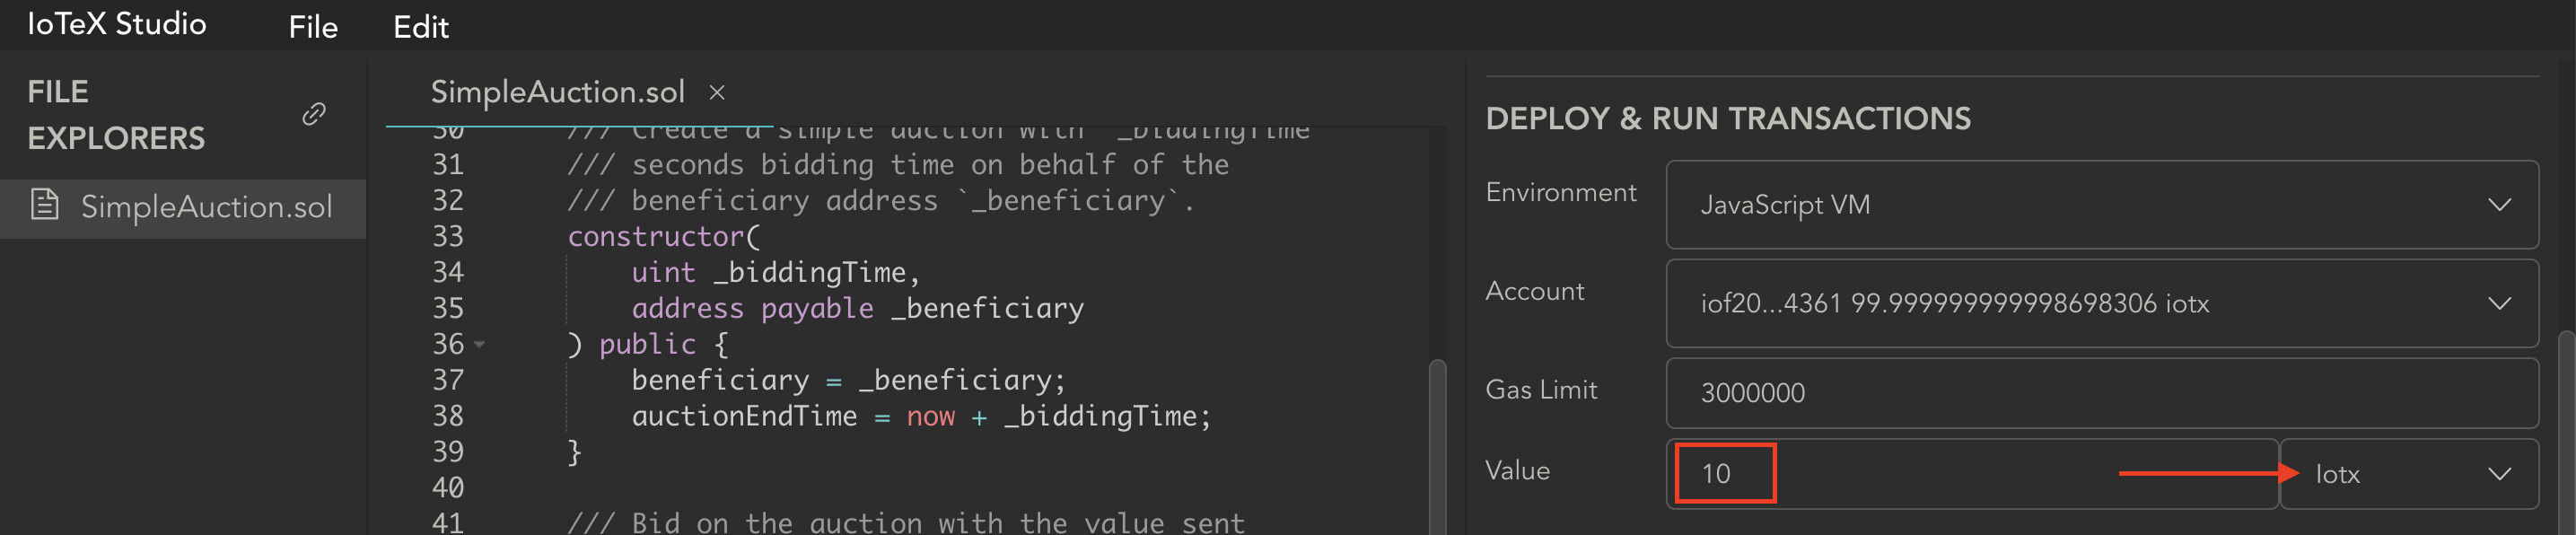
or you can make a 10 IOTX bid by setting 10 into the Value field of the DEPLOY & RUN TRANSACTIONS panel, and set IOTX as the unit, then click the Bid button of the SImpleAuction contract to call the Bid method!

8 Conclusions
This is all for this short tutorial! For more advanced contract operations, you can refer to the official IoTeX command line client ioctl and the IoTeX Antenna SDK!