IoTeX Network Mainnet v1.1 will be activated on August 19th 2020, around 4PM PT: once it’s activated you will be able to reclaim the buckets that you created with and ERC20 Hardware wallet like Ledger or Trezor, but have been automatically swapped to a native account which you cannot access from your Ledger anymore.
Prerequisites
- A Metamask-compatible browser (Chrome is preferred)
- Matamask plugin (download & install it here)
- IoPay Desktop (download & install here)
- Your Ledger or Trezor Hardware Wallet
Get your Ethereum wallet ready ( sender )
-
Open the Browser and Unlock Metamask
-
Connect your Ledger Hardware Wallet (the same account you used to create the ERC20 buckets)
Get your IoTeX Wallet ready ( recipient )
-
Open IoPay Desktop
-
Create or unlock any IoTeX Account in IoPay: make sure it’s an account for which you know the private key (not Ledger!), this is where you will to receive the bucket.
Reclaim the bucket
- Input your ERC20 address in (this web tool) to obtain the ID number of your ERC20 buckets:

Please notice: this service will is down from March 10, but will be restored soon: meanwhile please PM me on Telegram at <a href="Telegram: Contact @zimne>@zimne or, if you are an advanced user, you can use ioctl to get the bucket infos using the following commands:
#This provides you with the native address to which your ETH staking has been copied
ioctl account ethAddr <YOUR_ETH_ADDRESS>

#This provides you with all the buckets owned
ioctl bc buckitlist voter <YOUR_NATIVE_ADDRESS>
Do the following steps for all the buckets to reclaim:
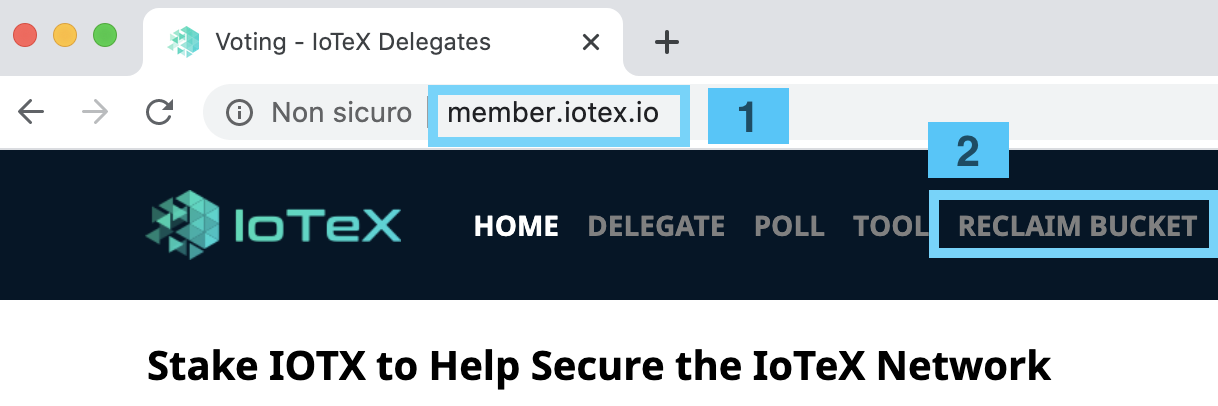
- Open the IoTeX Reclaim Tool web page and click " Reclaim Bucket "
-
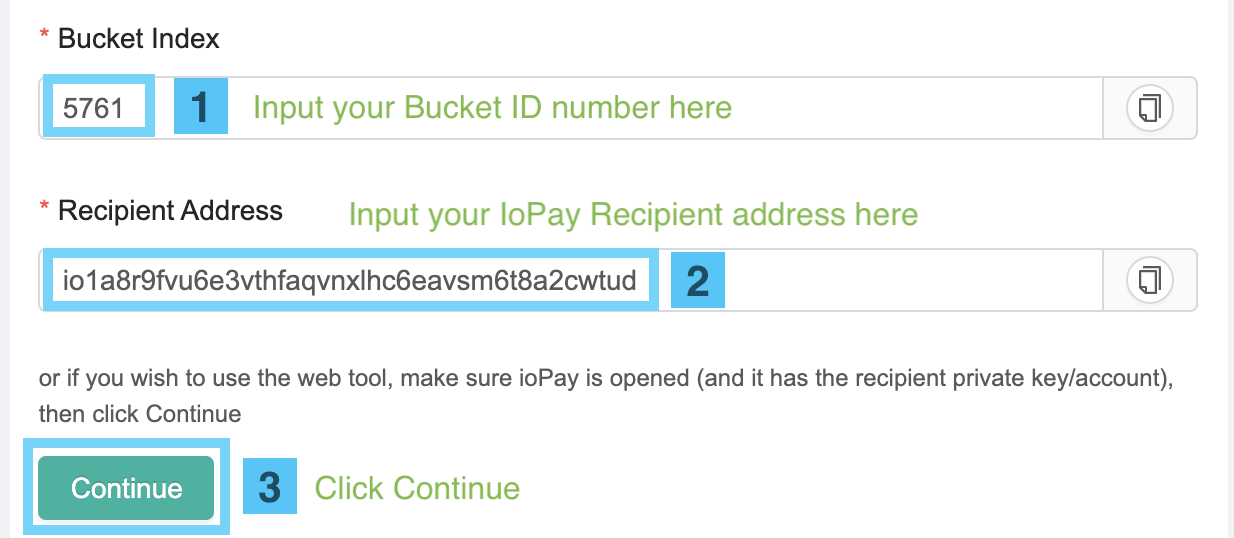
Input the ID number of the bucket you want to reclaim in the “Bucket Index” field
-
Input the recipient address (see previous step 4) .
-
Click continue
-
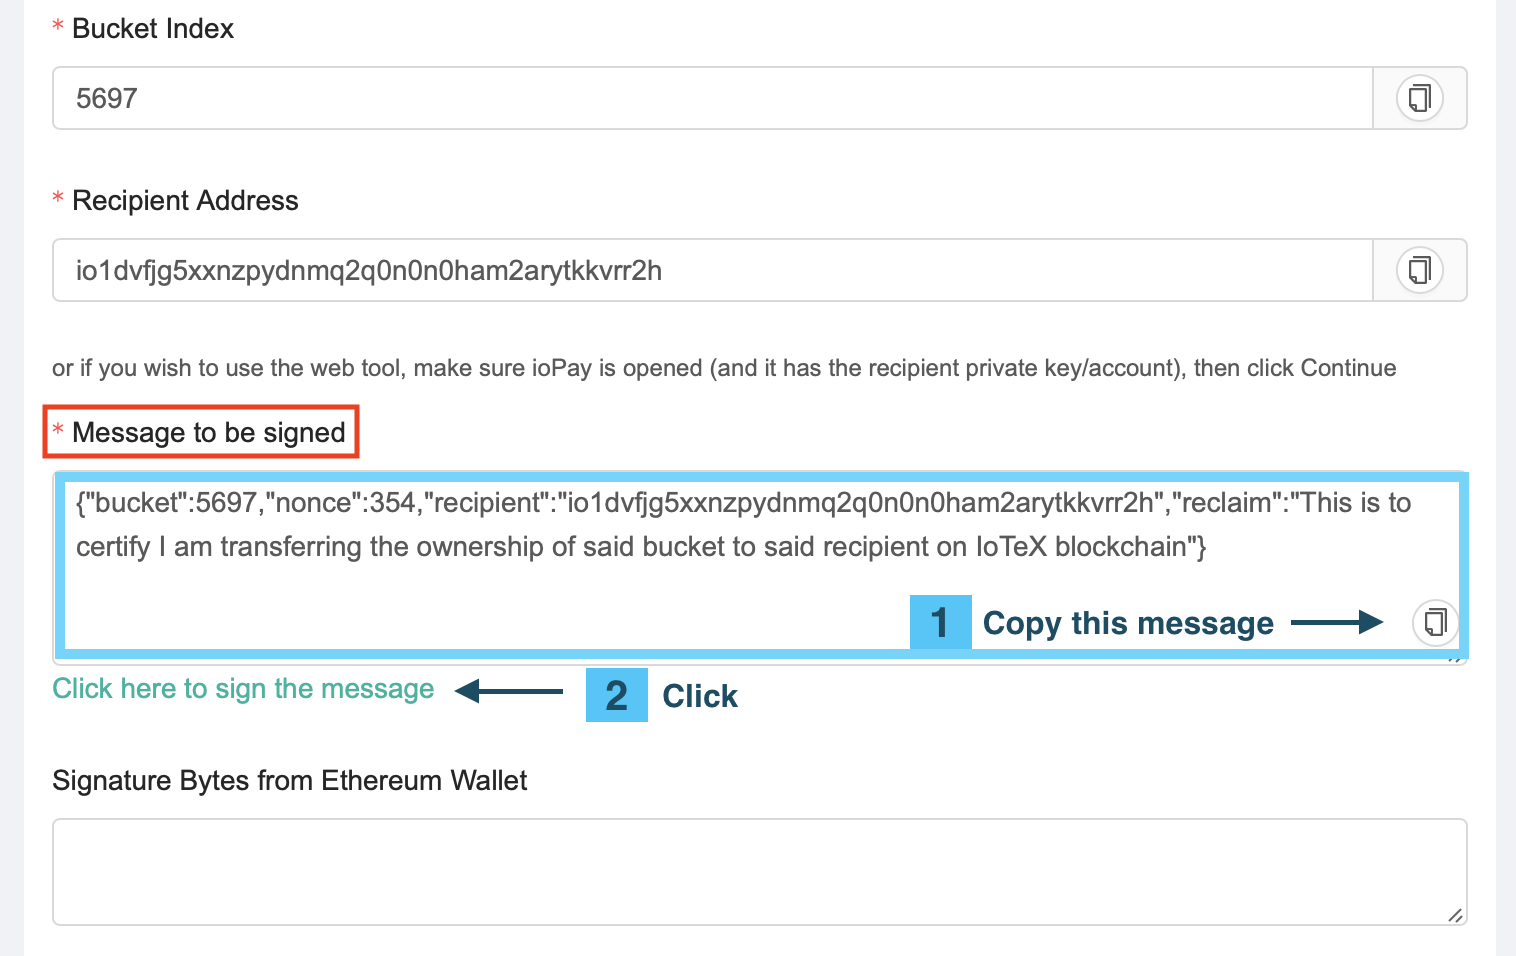
Copy the “Message to be Signed”
-
Click the link that says “Click here to sign the message” to open MyCrypto website
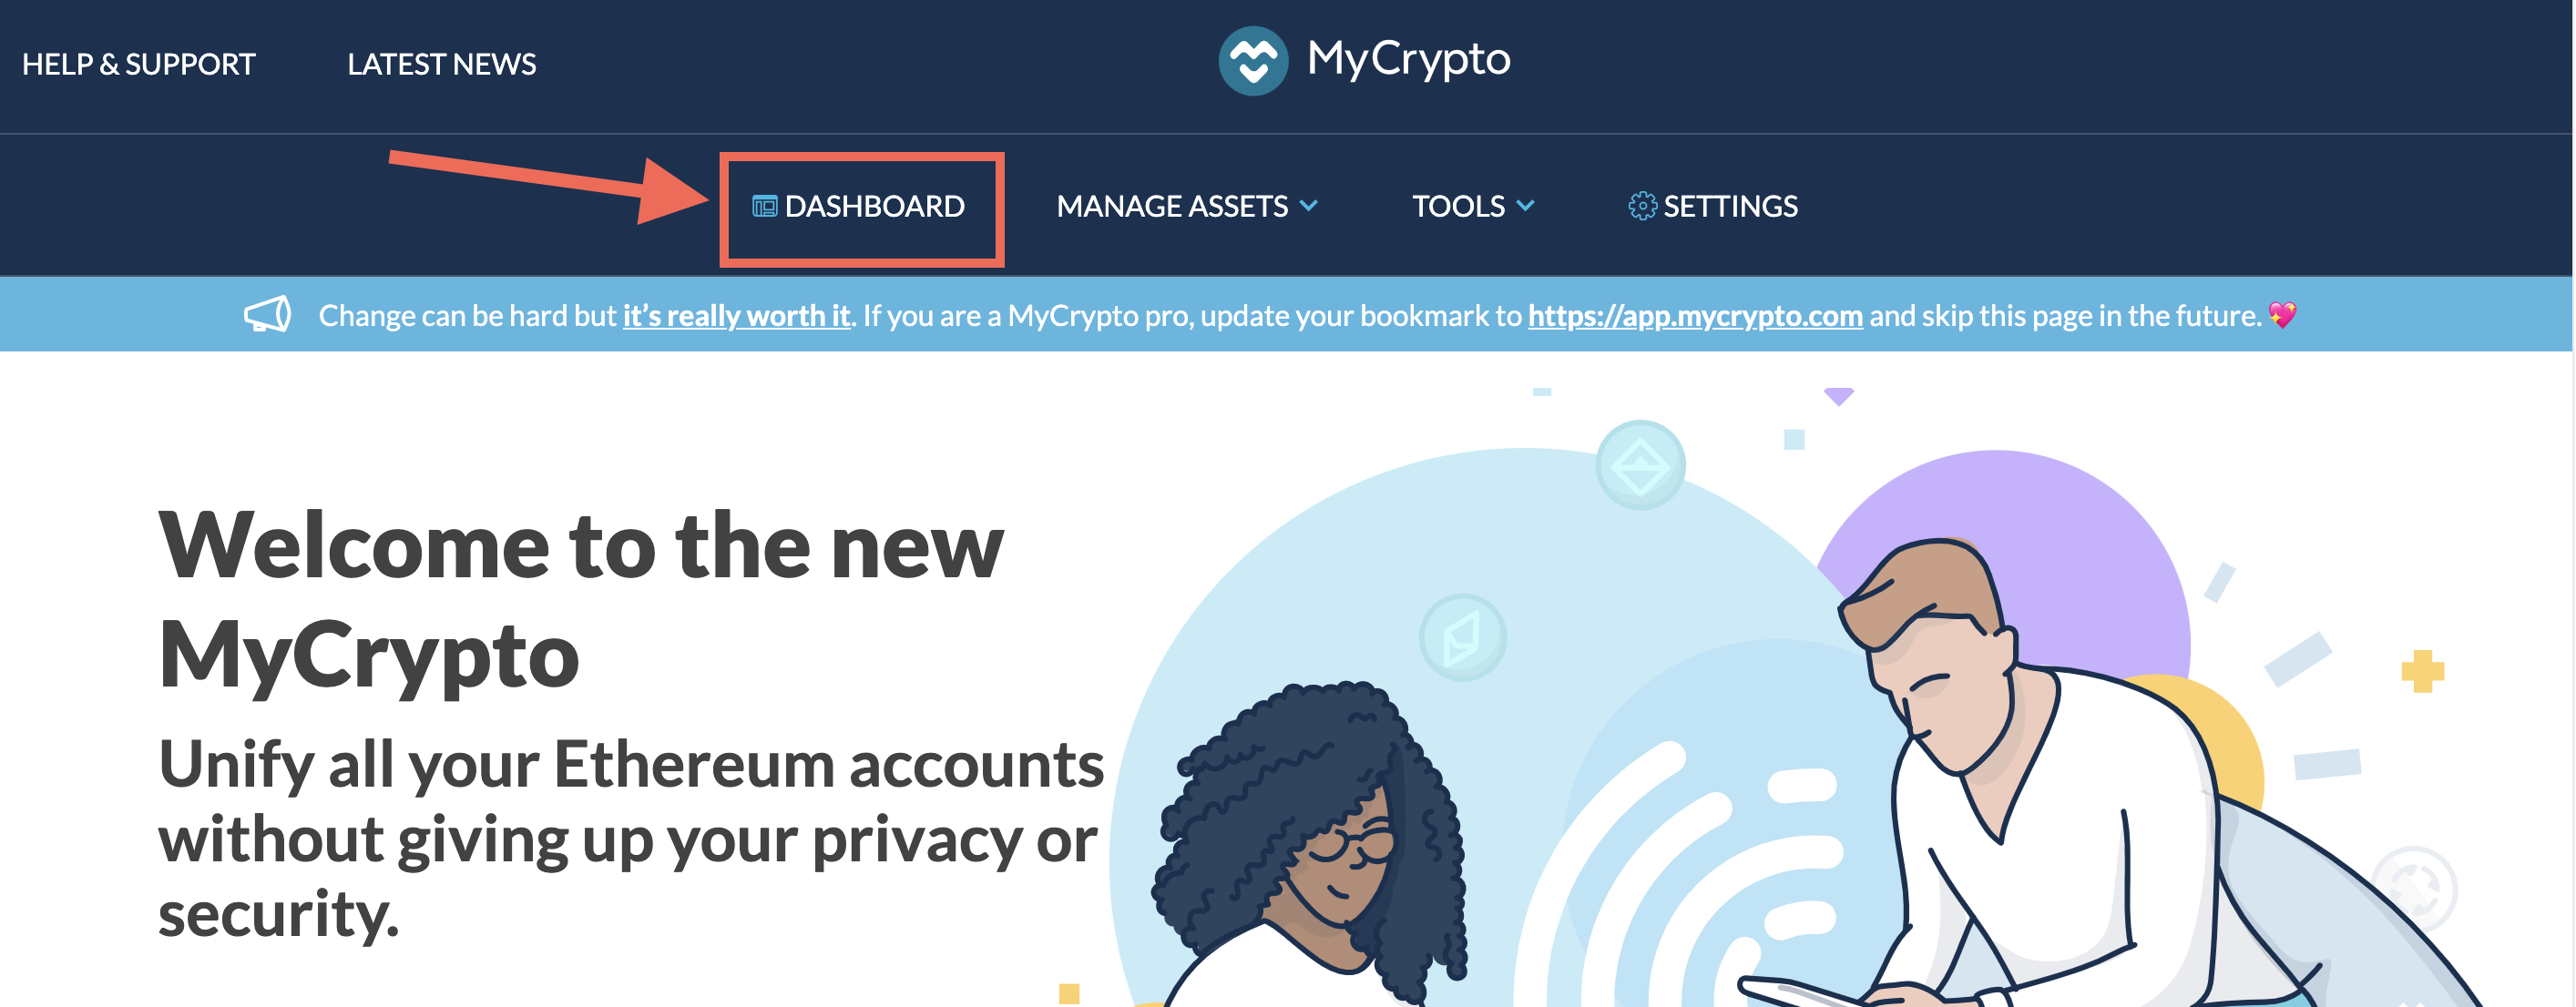
- The MyCrypto Website will open:
- select " Dashboard " from the main menu:
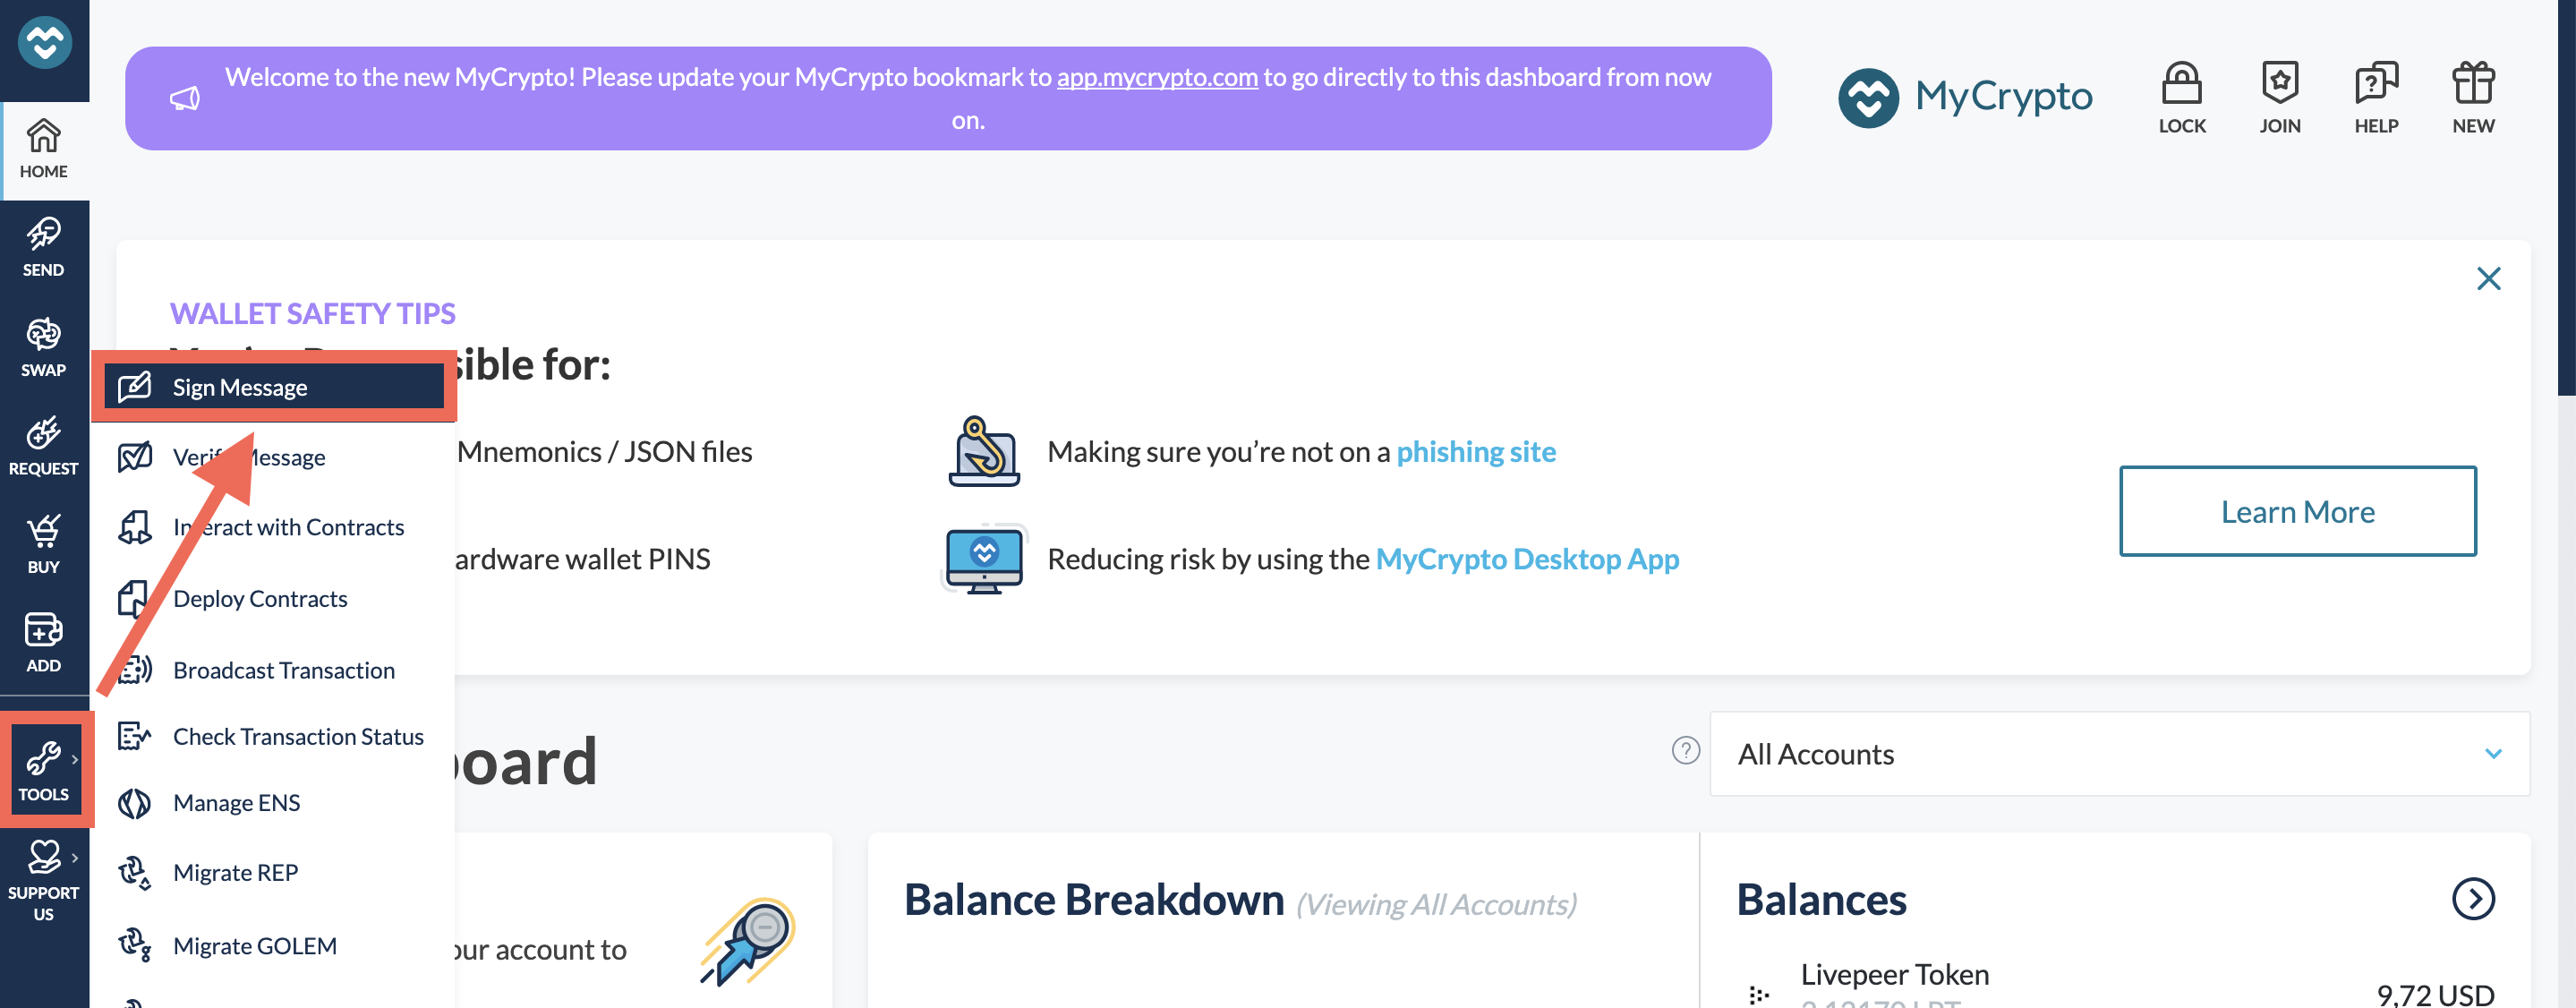
- Then select “Tools”->“Sign Message” from the left toolbar:
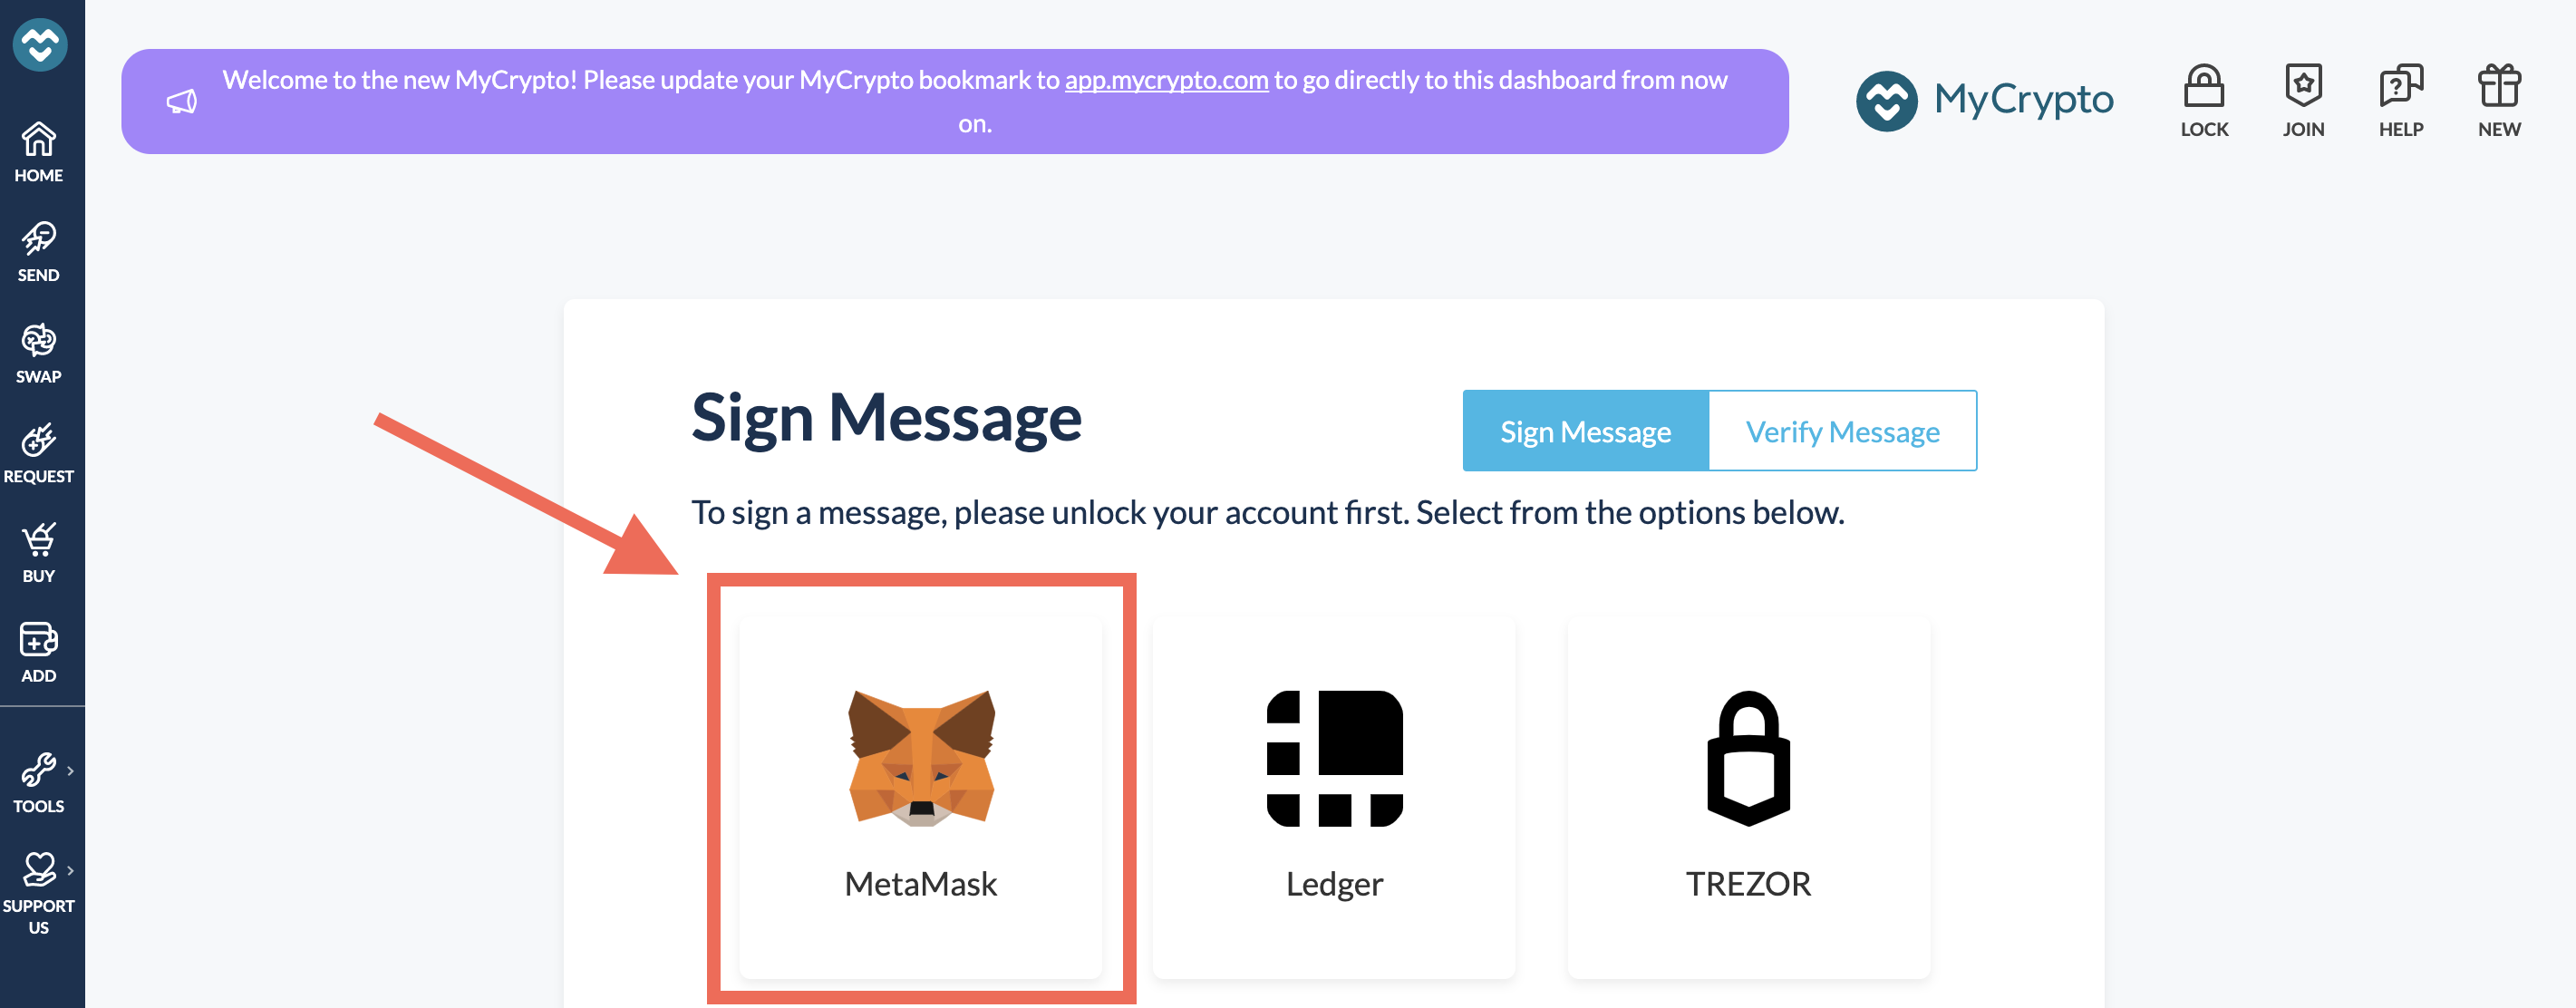
- If Metamask is not connected to the MyCrypto website, you will have the choice to connect it: just click the Metamask icon:
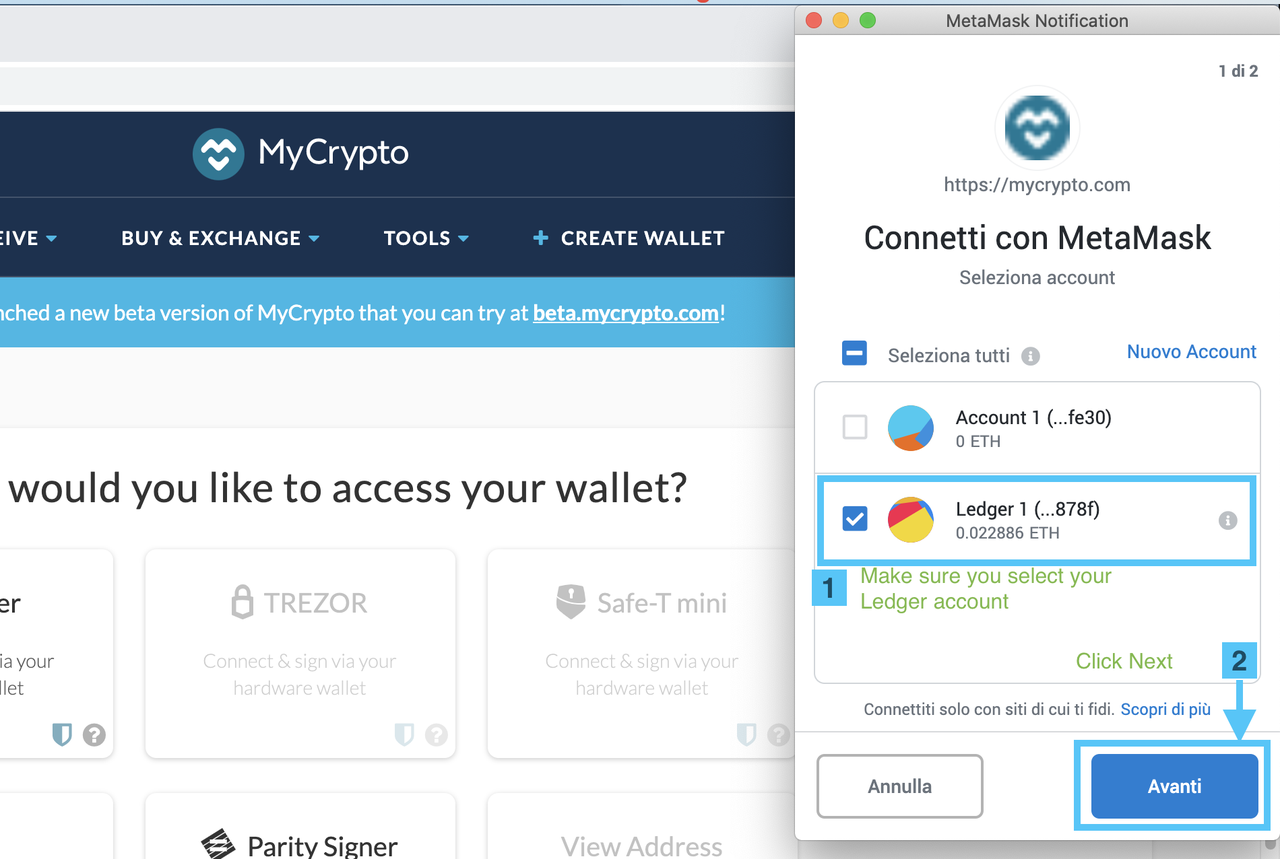
- In the next page Metamask will pop-up: make sure your Ledger is connected , select your Ledger account in Metamask and click Next and then Connect.
-
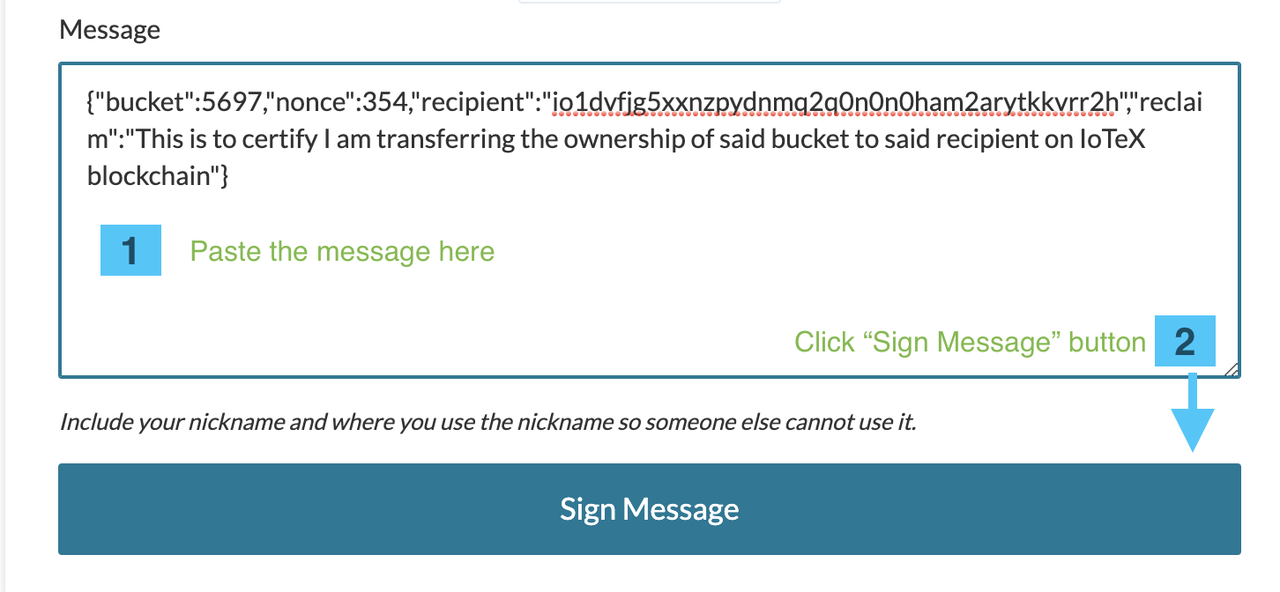
You can now paste the message you copied earlier on step 11., in the " Message " text area
-
Click " Sign Message " button
confirm in Metamask
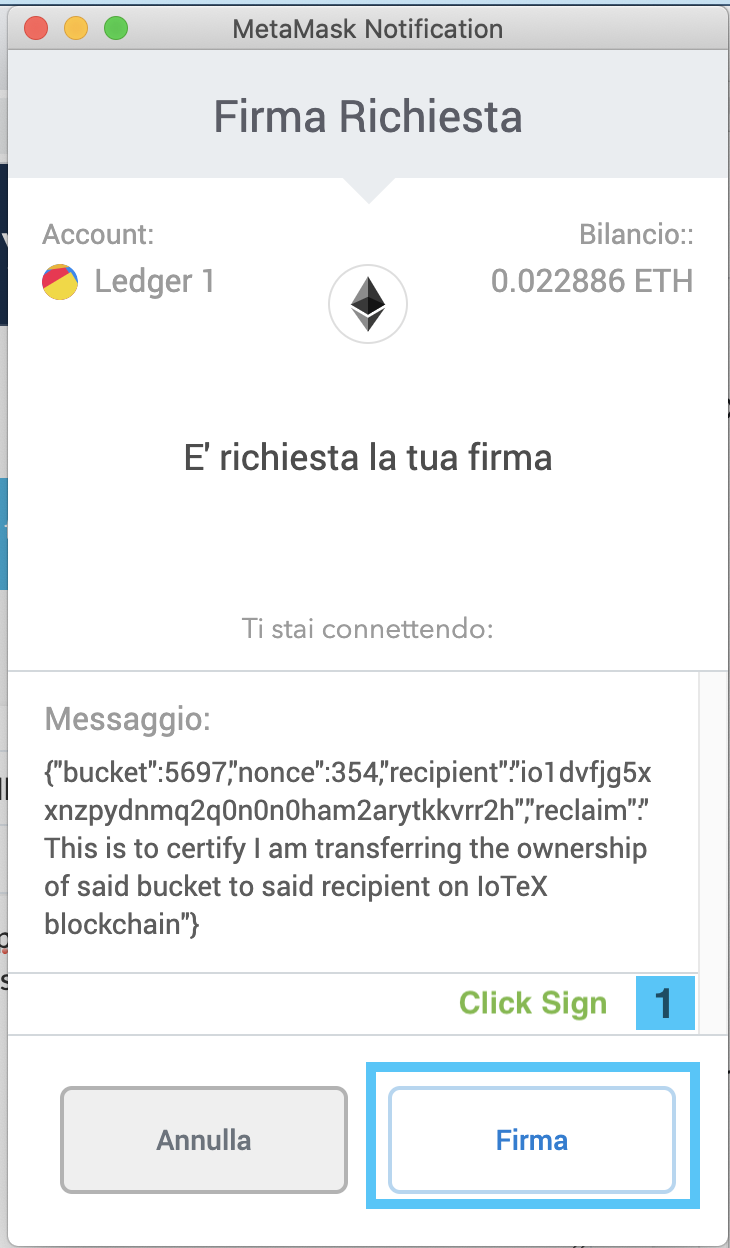
Windows Users Alert: A recent windows update could trigger a “Windows Security” dialog box at this point that asks to insert a security key in your PC: just ignore that dialog, you can move it aside if you want, but do not close it. Proceed with signing on Ledger, after that the dialog box will close.
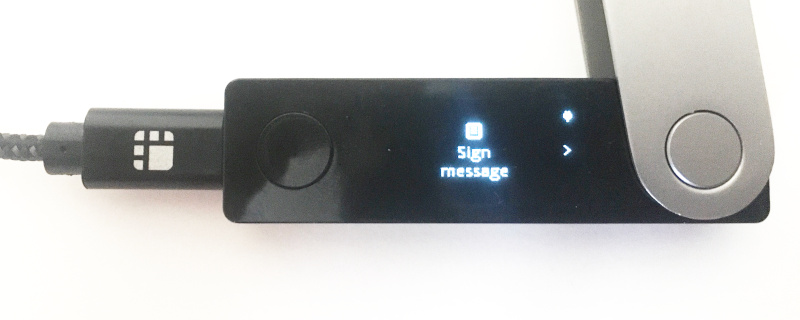
Use your Ledger wallet to sign the transaction:
Finally, copy the signature text that will appear in the " Signature " text area below (see the image: only copy the signature data, and without the leading “0x”: do not copy the whole text!)
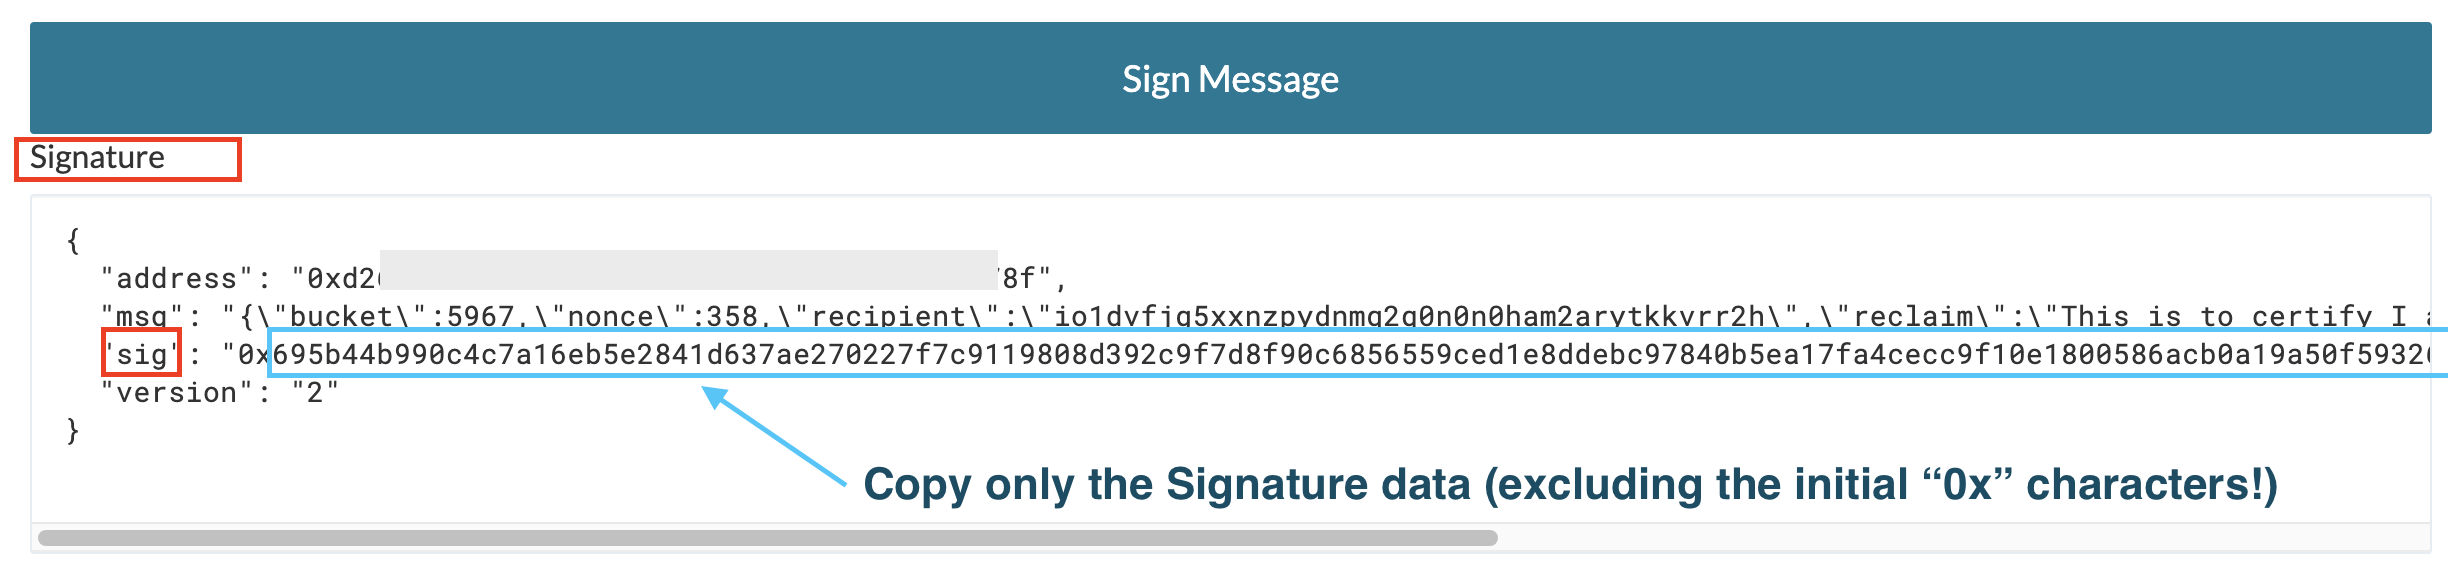
-
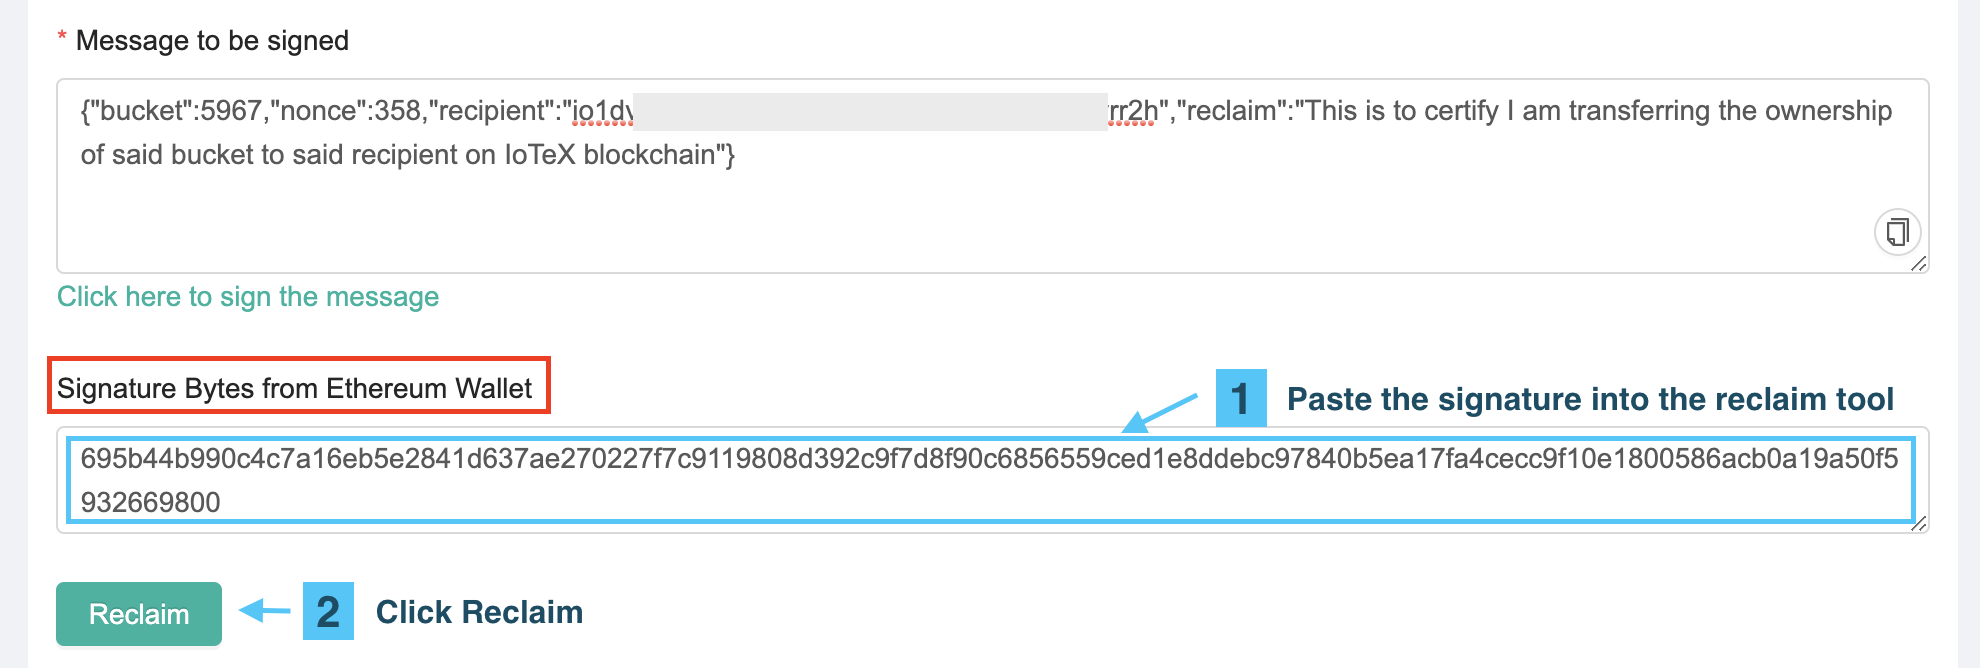
Close the MyCrypto page to go back to the IoTeX Reclaim Too, and paste the signature in the “Signature Bytes from Ethereum Wallet” text area
-
Click “Reclaim” button
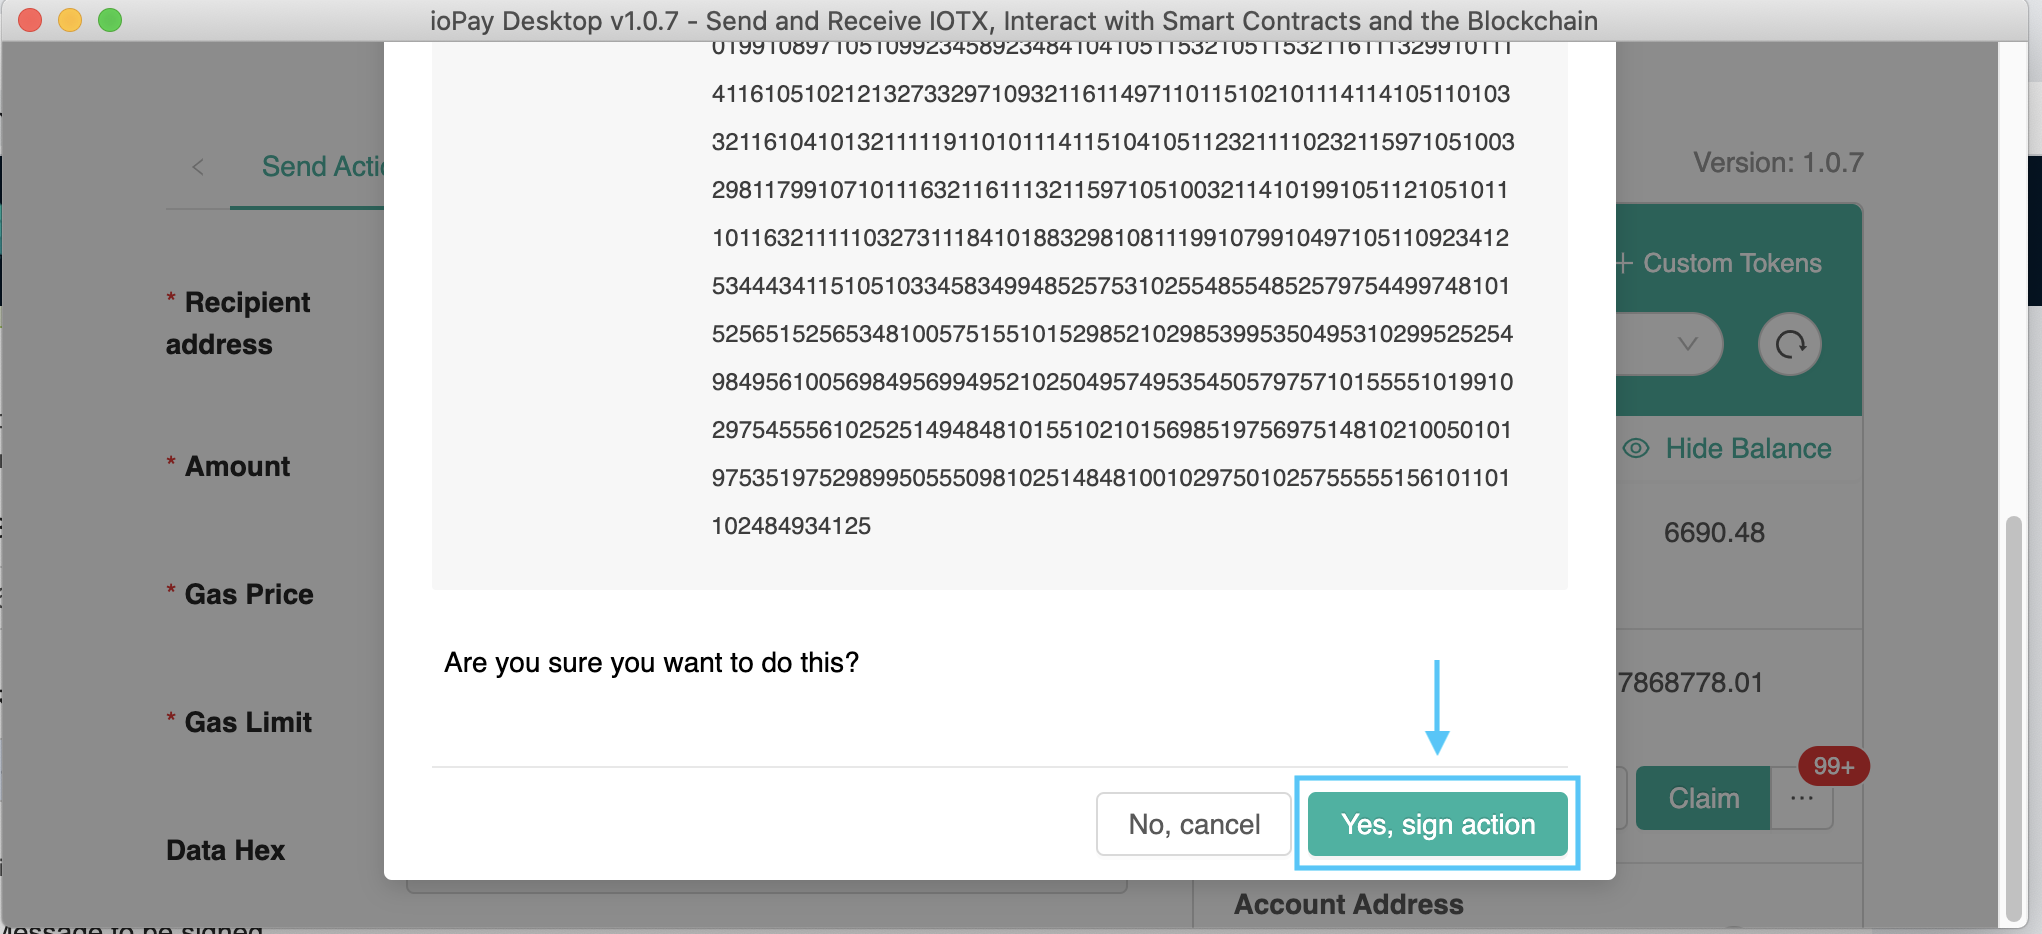
- Sign the transaction request in IoPay Desktop: the maximum fee for this transaction is 0.2 IOTX, please make sure you have enough balance in IoPay
Verify
- Wait a few seconds, leave IoPay Desktop open, then go to the IoTeX staking portal and check that your buckets have been transferred to the receiver address.