
IoTeX Token Minter is a web tool that allows anyone to create and deploy their own token on the IoTeX blockchain in no time. Token Minter supports both Fungible (XRC20) and Non-Fungible Tokens (XRC721).
This tutorial will show you how to create your own XRC721 token with Token Minter. For our XRC20 tutorial, see this thread.
1. Getting started
a) Download ioPay Desktop: Before you start using minttoken.io you must download ioPay Desktop, the official IoTeX Wallet: ioPay - AI-Powered Web3 Super Wallet
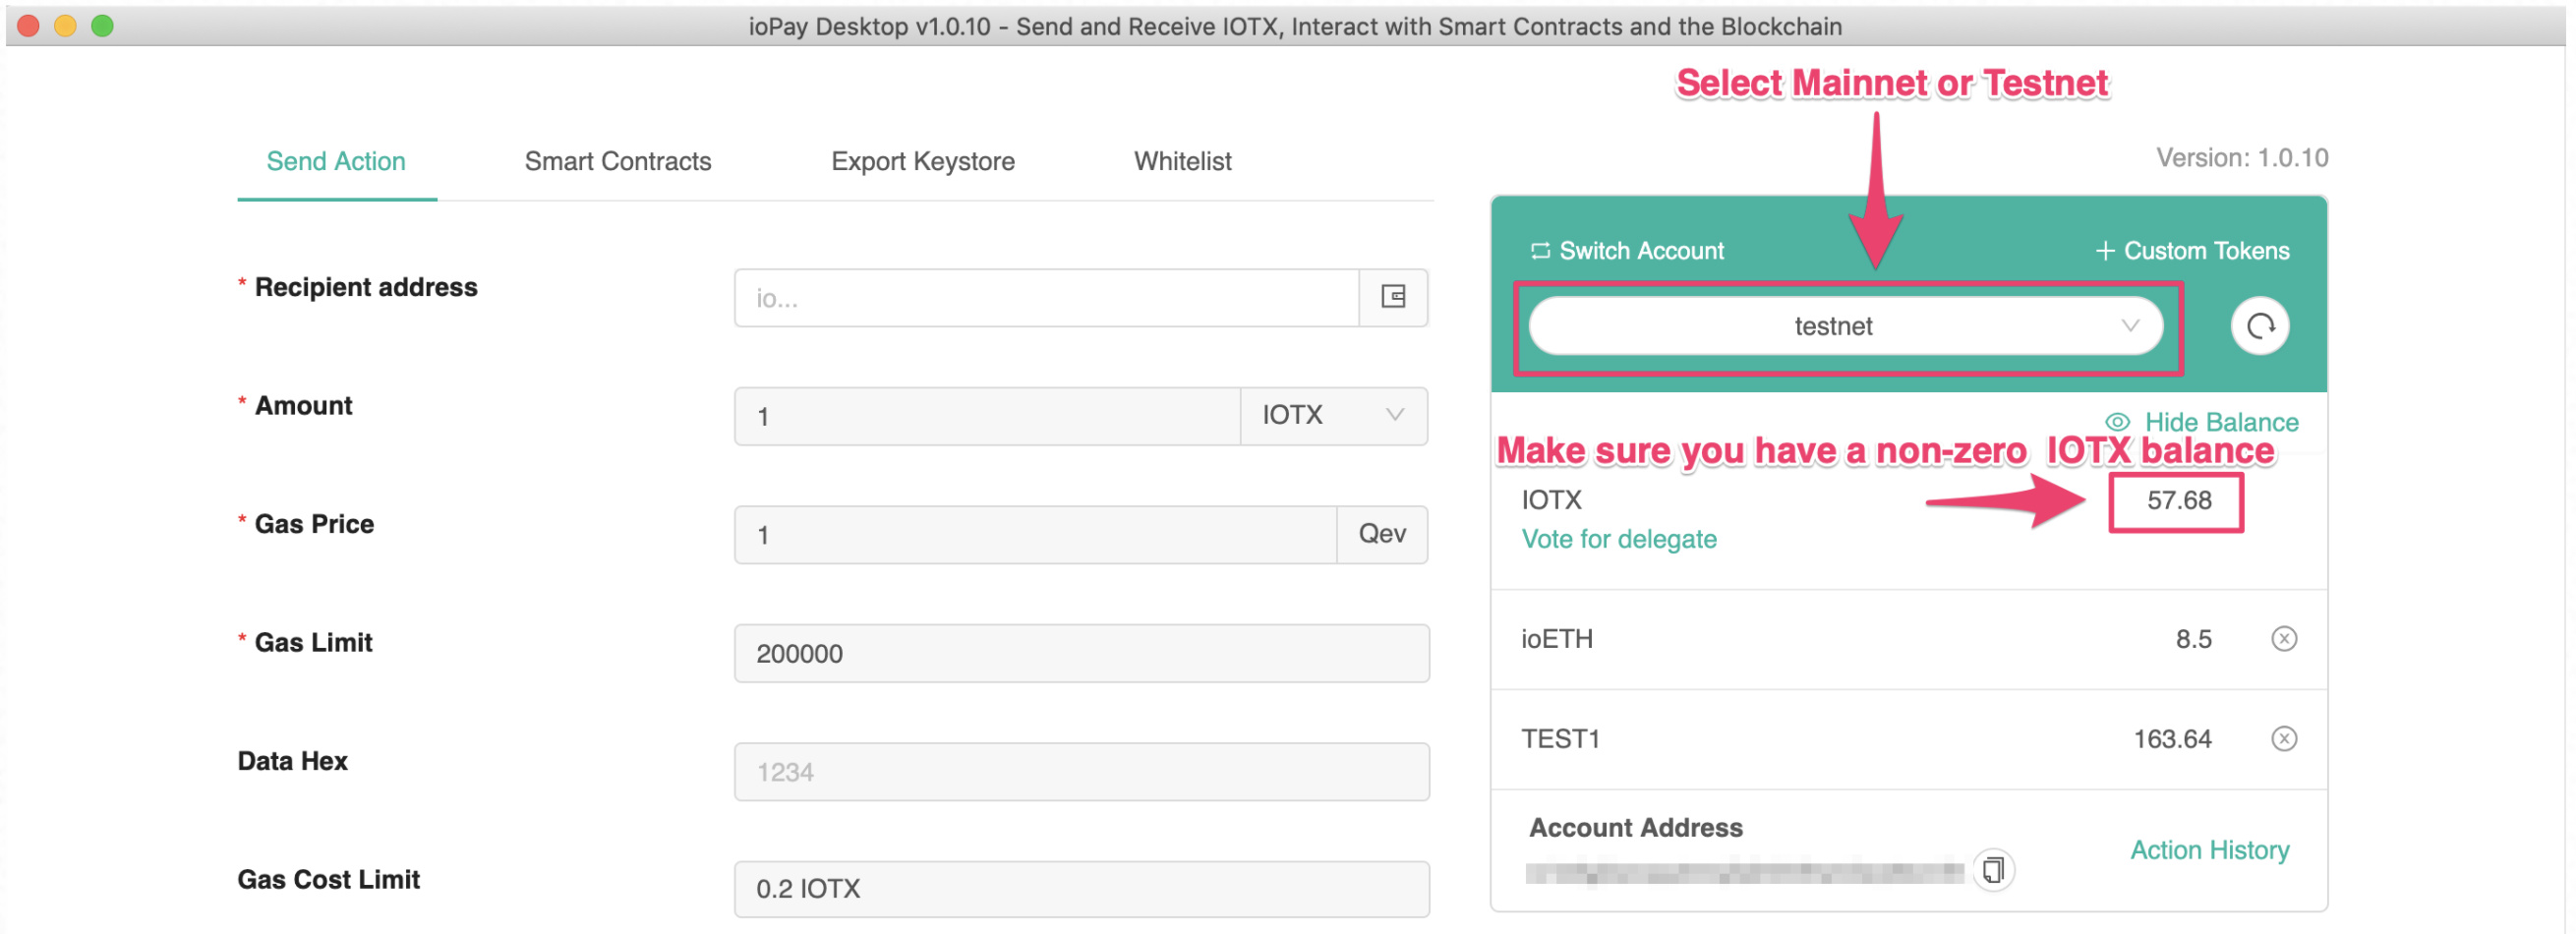
b) Login to ioPay Desktop: Launch ioPay, login to your wallet, select the correct network you want to deploy the token (Mainnet, Testnet). Make sure you have some IOTX for gas fees!
c) Access the MintToken website : make sure ioPay Desktop is open and unlocked, then open your browser and go to https://minttoken.io
2. Configure the token contract

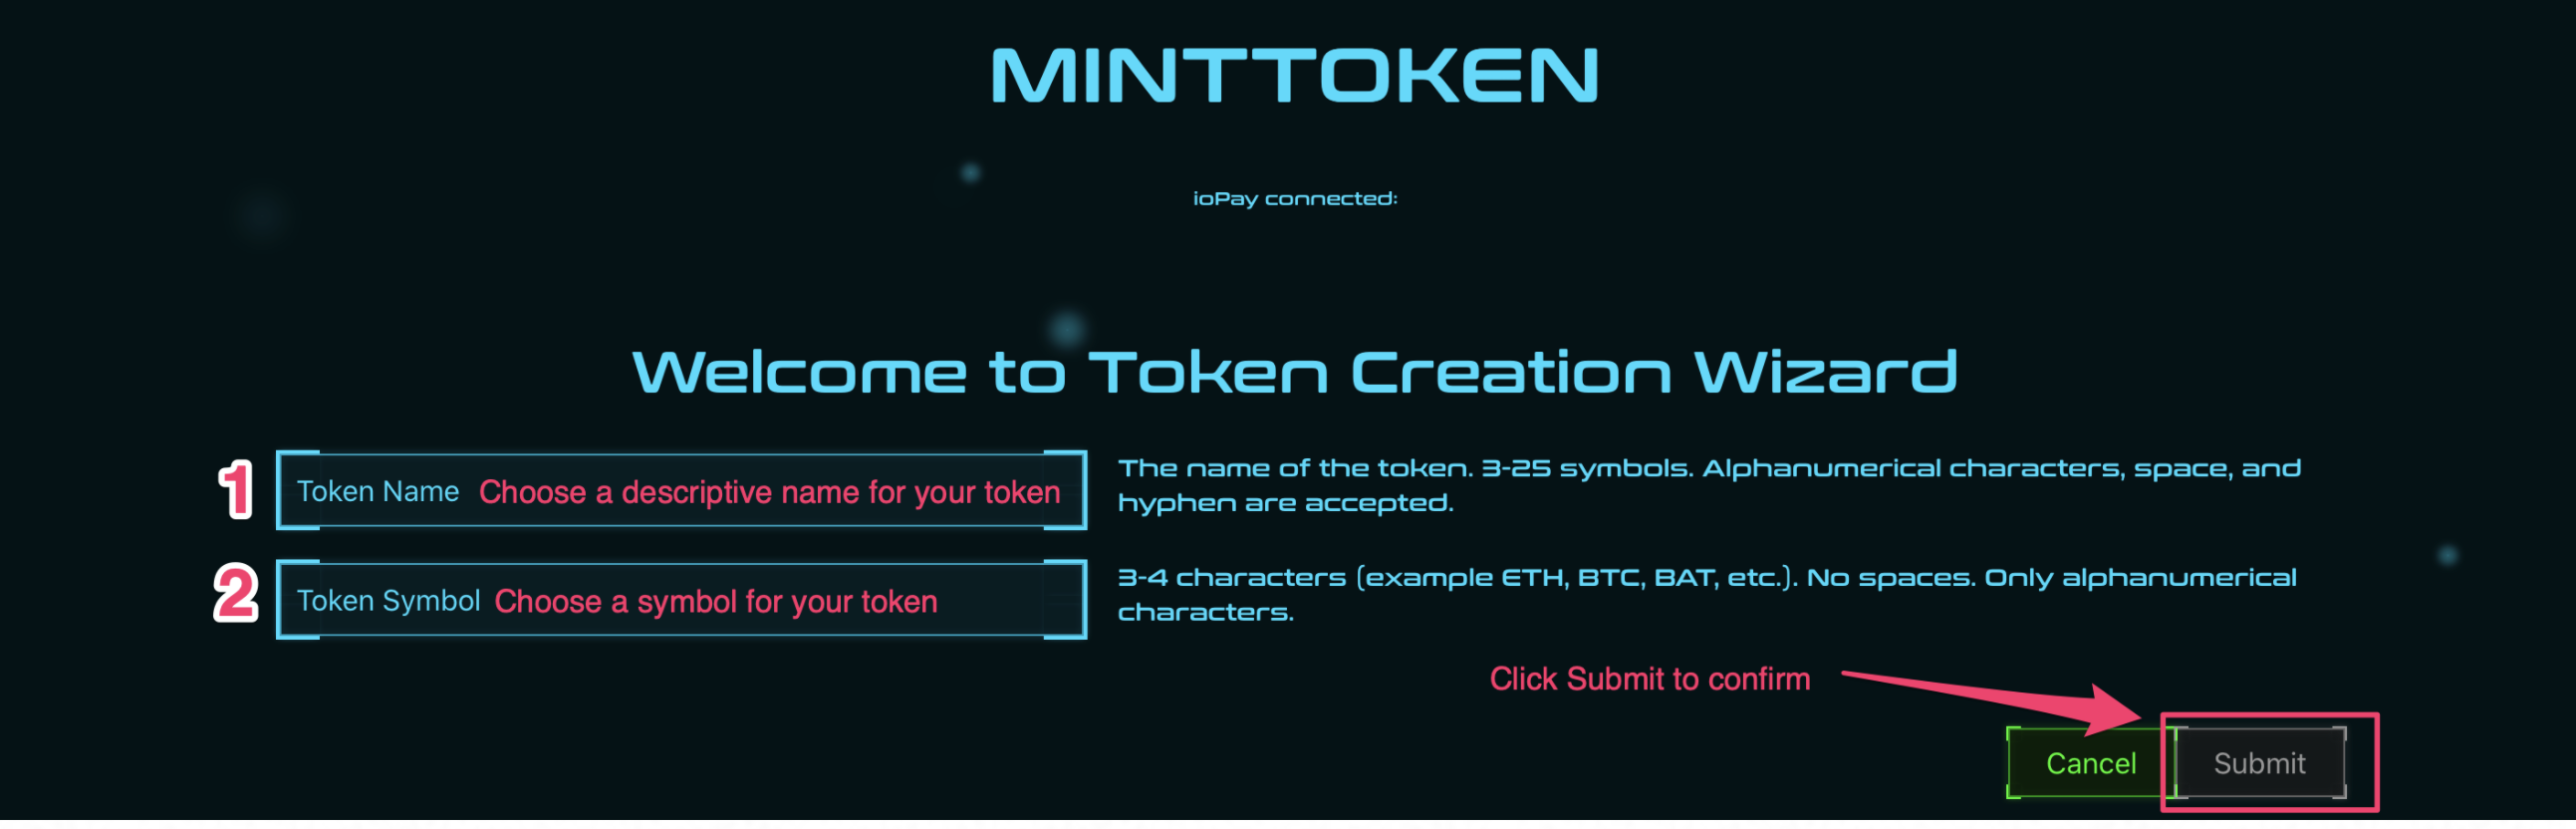
a) In the next screen you will be asked to define and deploy your NFT token contract. Note that this NFT token contract will does not define a max supply or pre-mint any NFTs – it simply deploys a contract, which you can then use to mint one NFT token at a time with unique characteristics (e.g., name, description, attached data). More on that later in the tutorial!
- Set the Token name : this is a descriptive name for your token
- Set the Token symbol: this is a short symbol representing the token
b) When you are ready, click the Submit button to proceed with the token contract deployment process:
3. Deploy the token contract to the blockchain
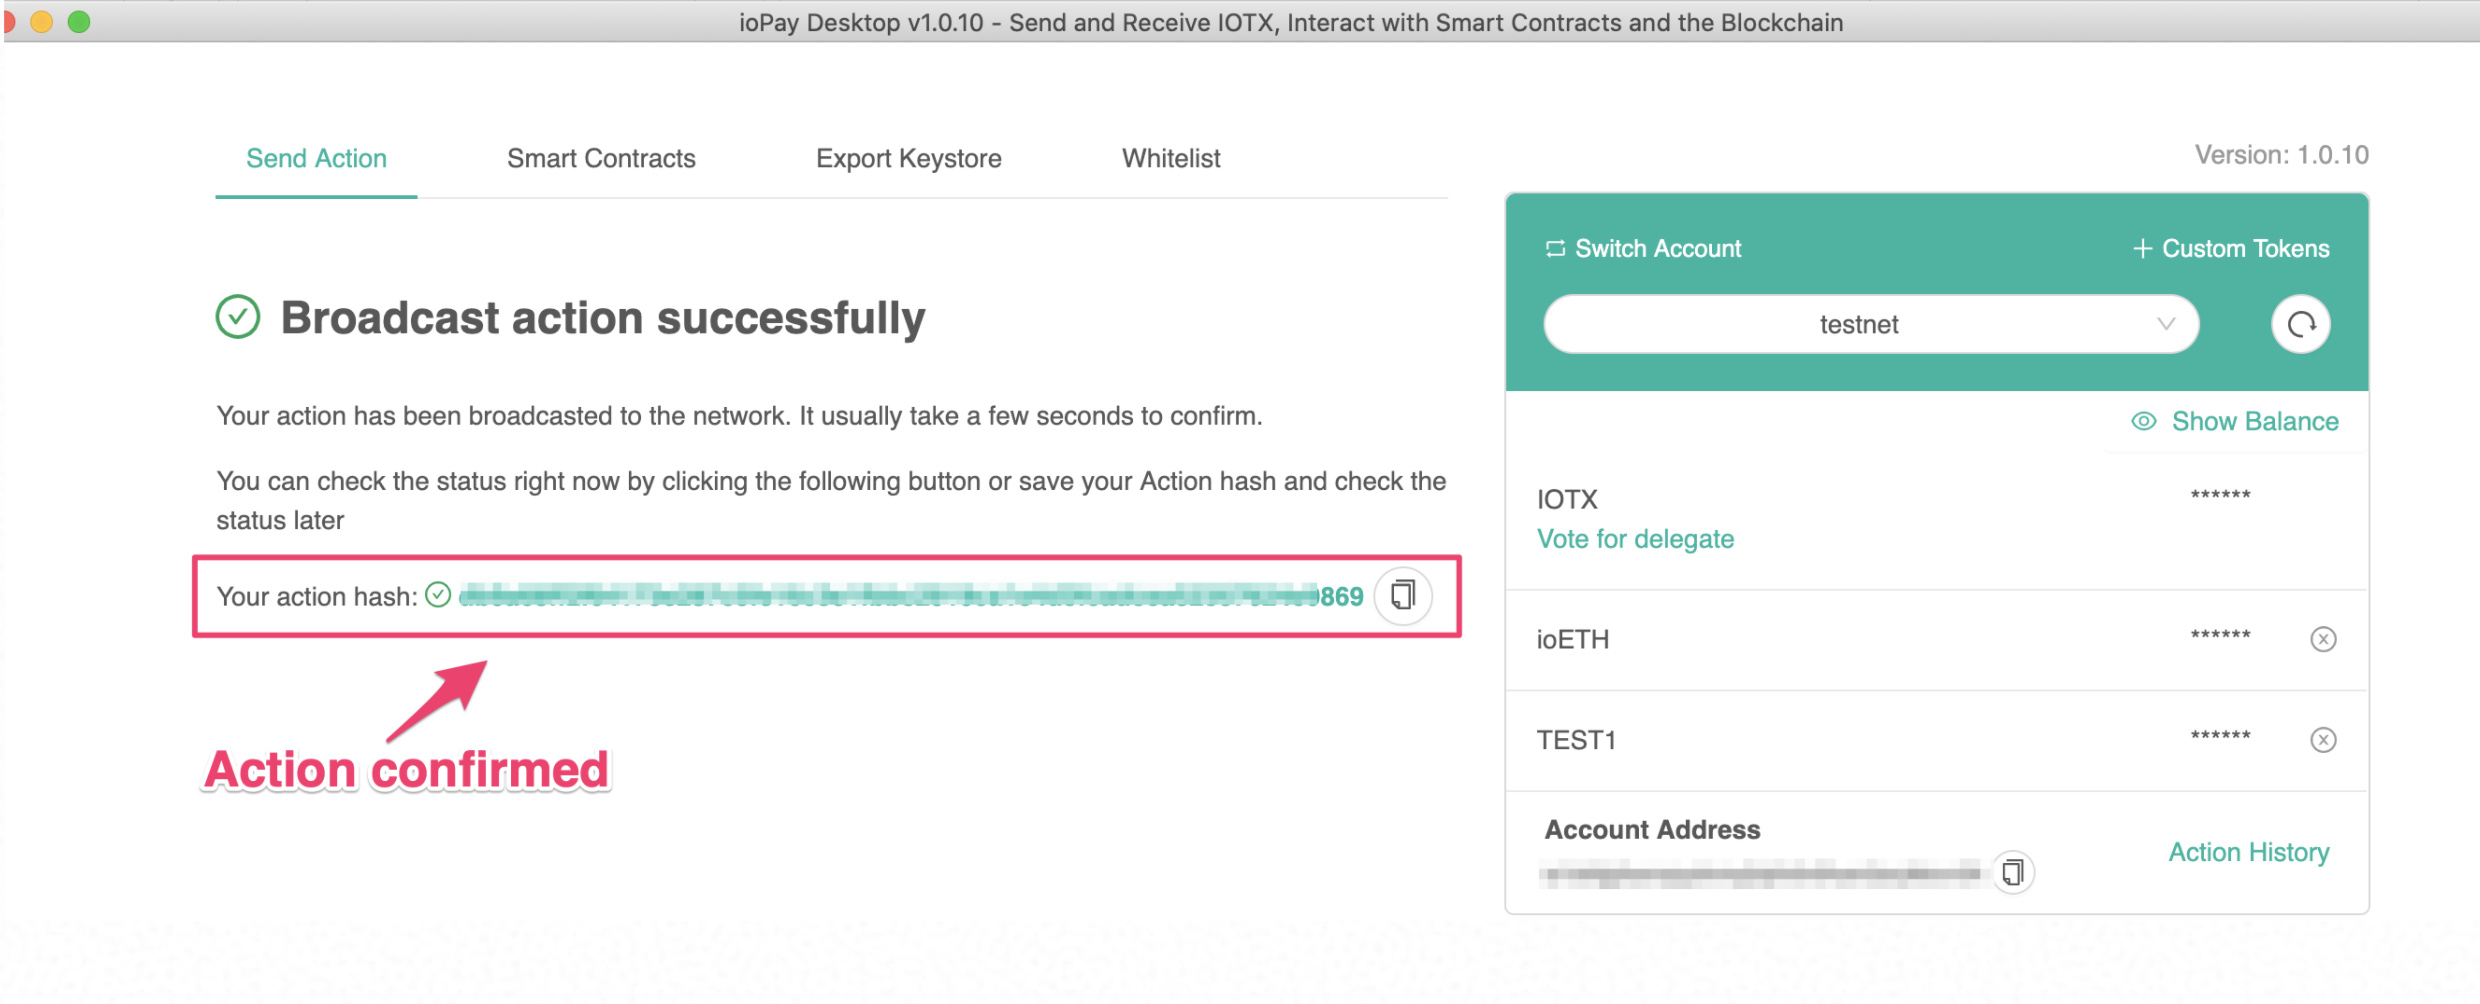
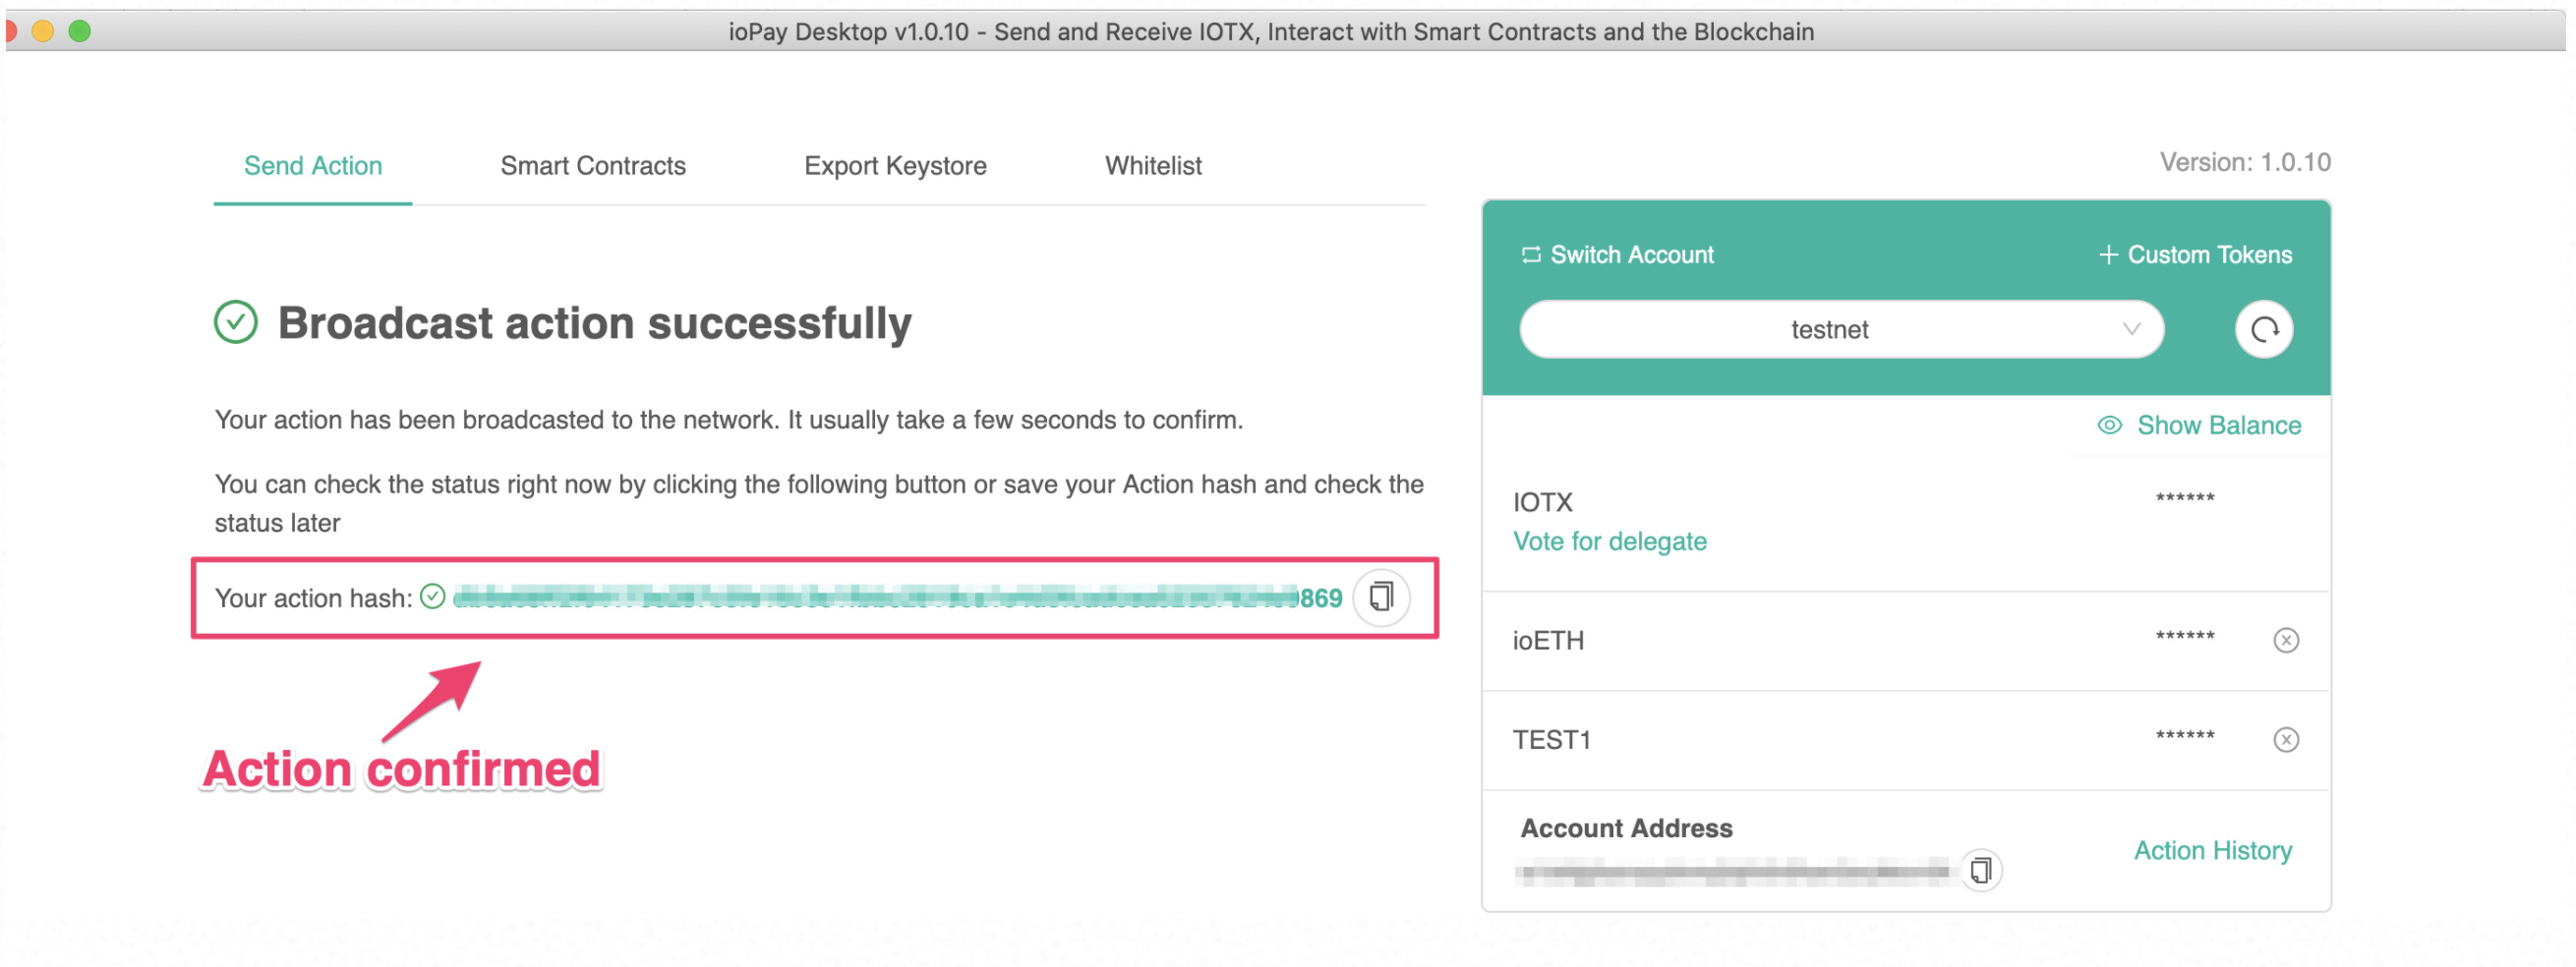
After clicking Submit, your ioPay wallet will display a request to sign the contract deployment action: scroll down and click Yes, sign action . You should see a confirmation after your action is broadcasted to the blockchain with your action hash.

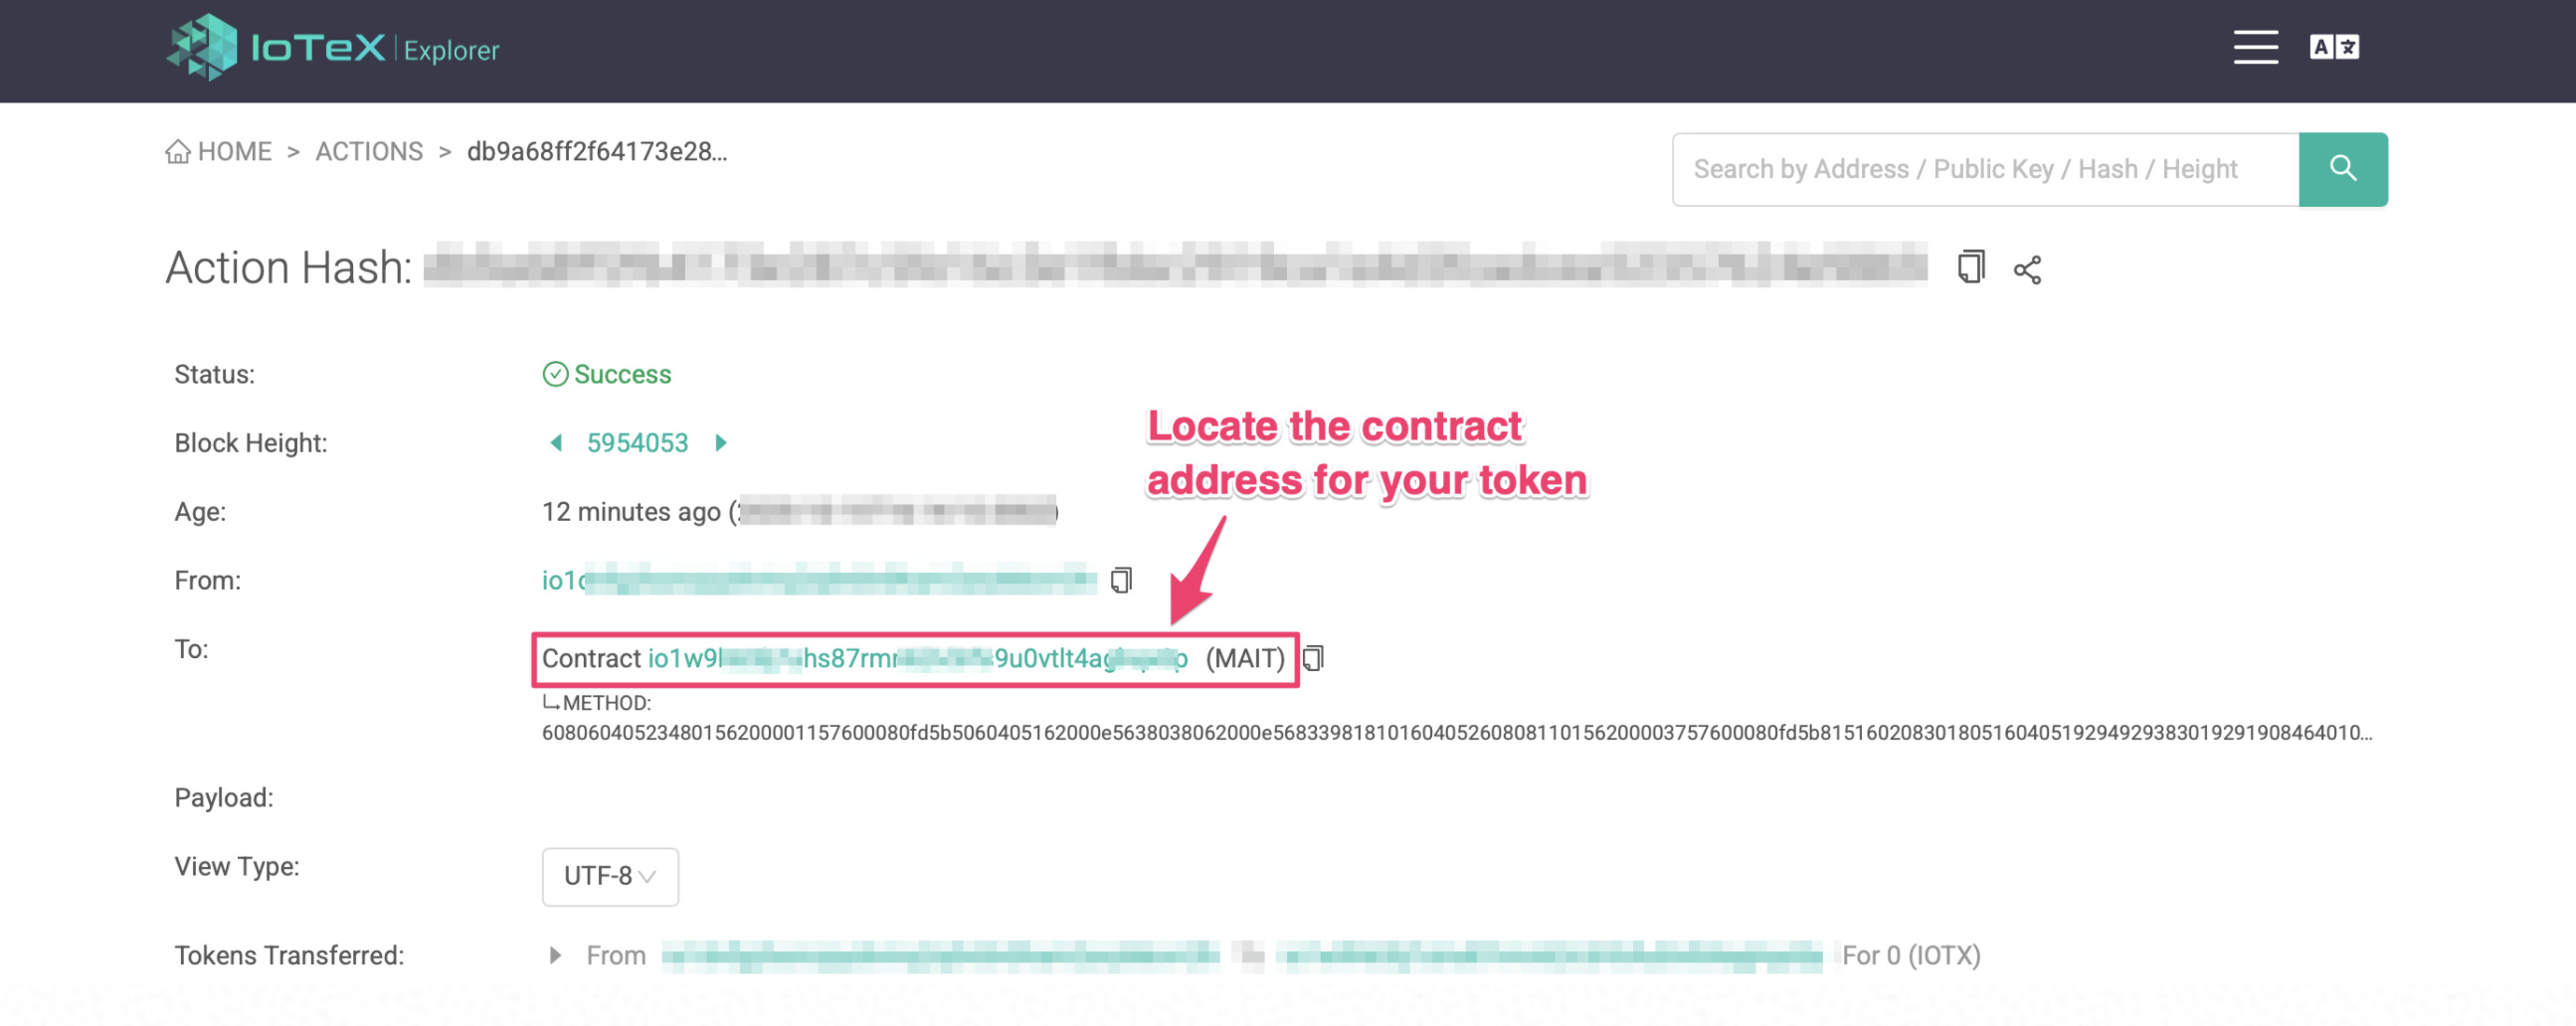
4. Find the token contract address on iotexscan.io
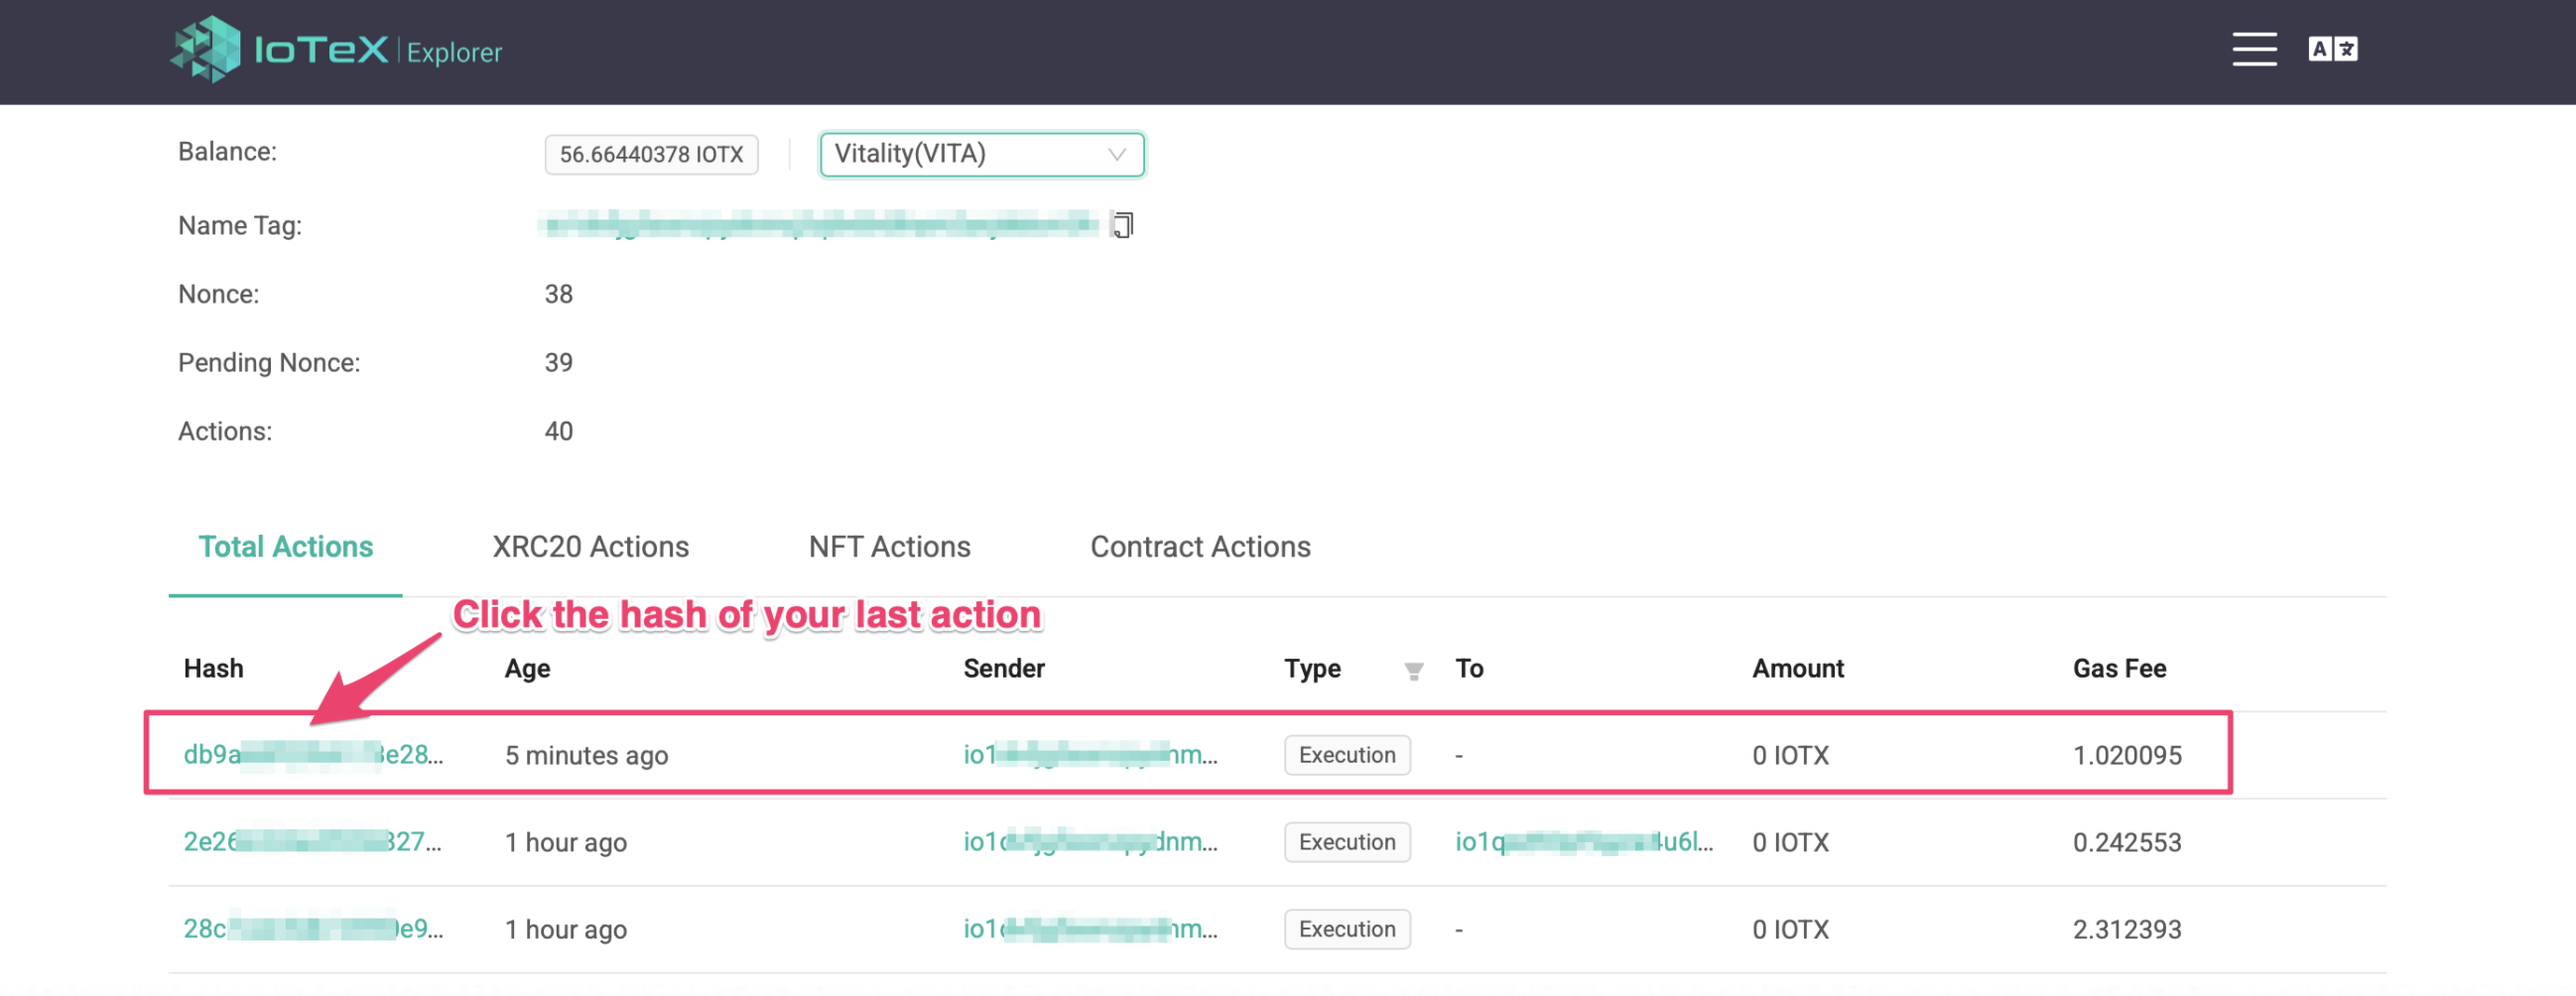
a) Once the token has been deployed, you can open your wallet on the iotexscan.io explorer:

b) In the explorer, locate and click your last action to see the details:
c) In the action details, locate and copy the contract address for your token:
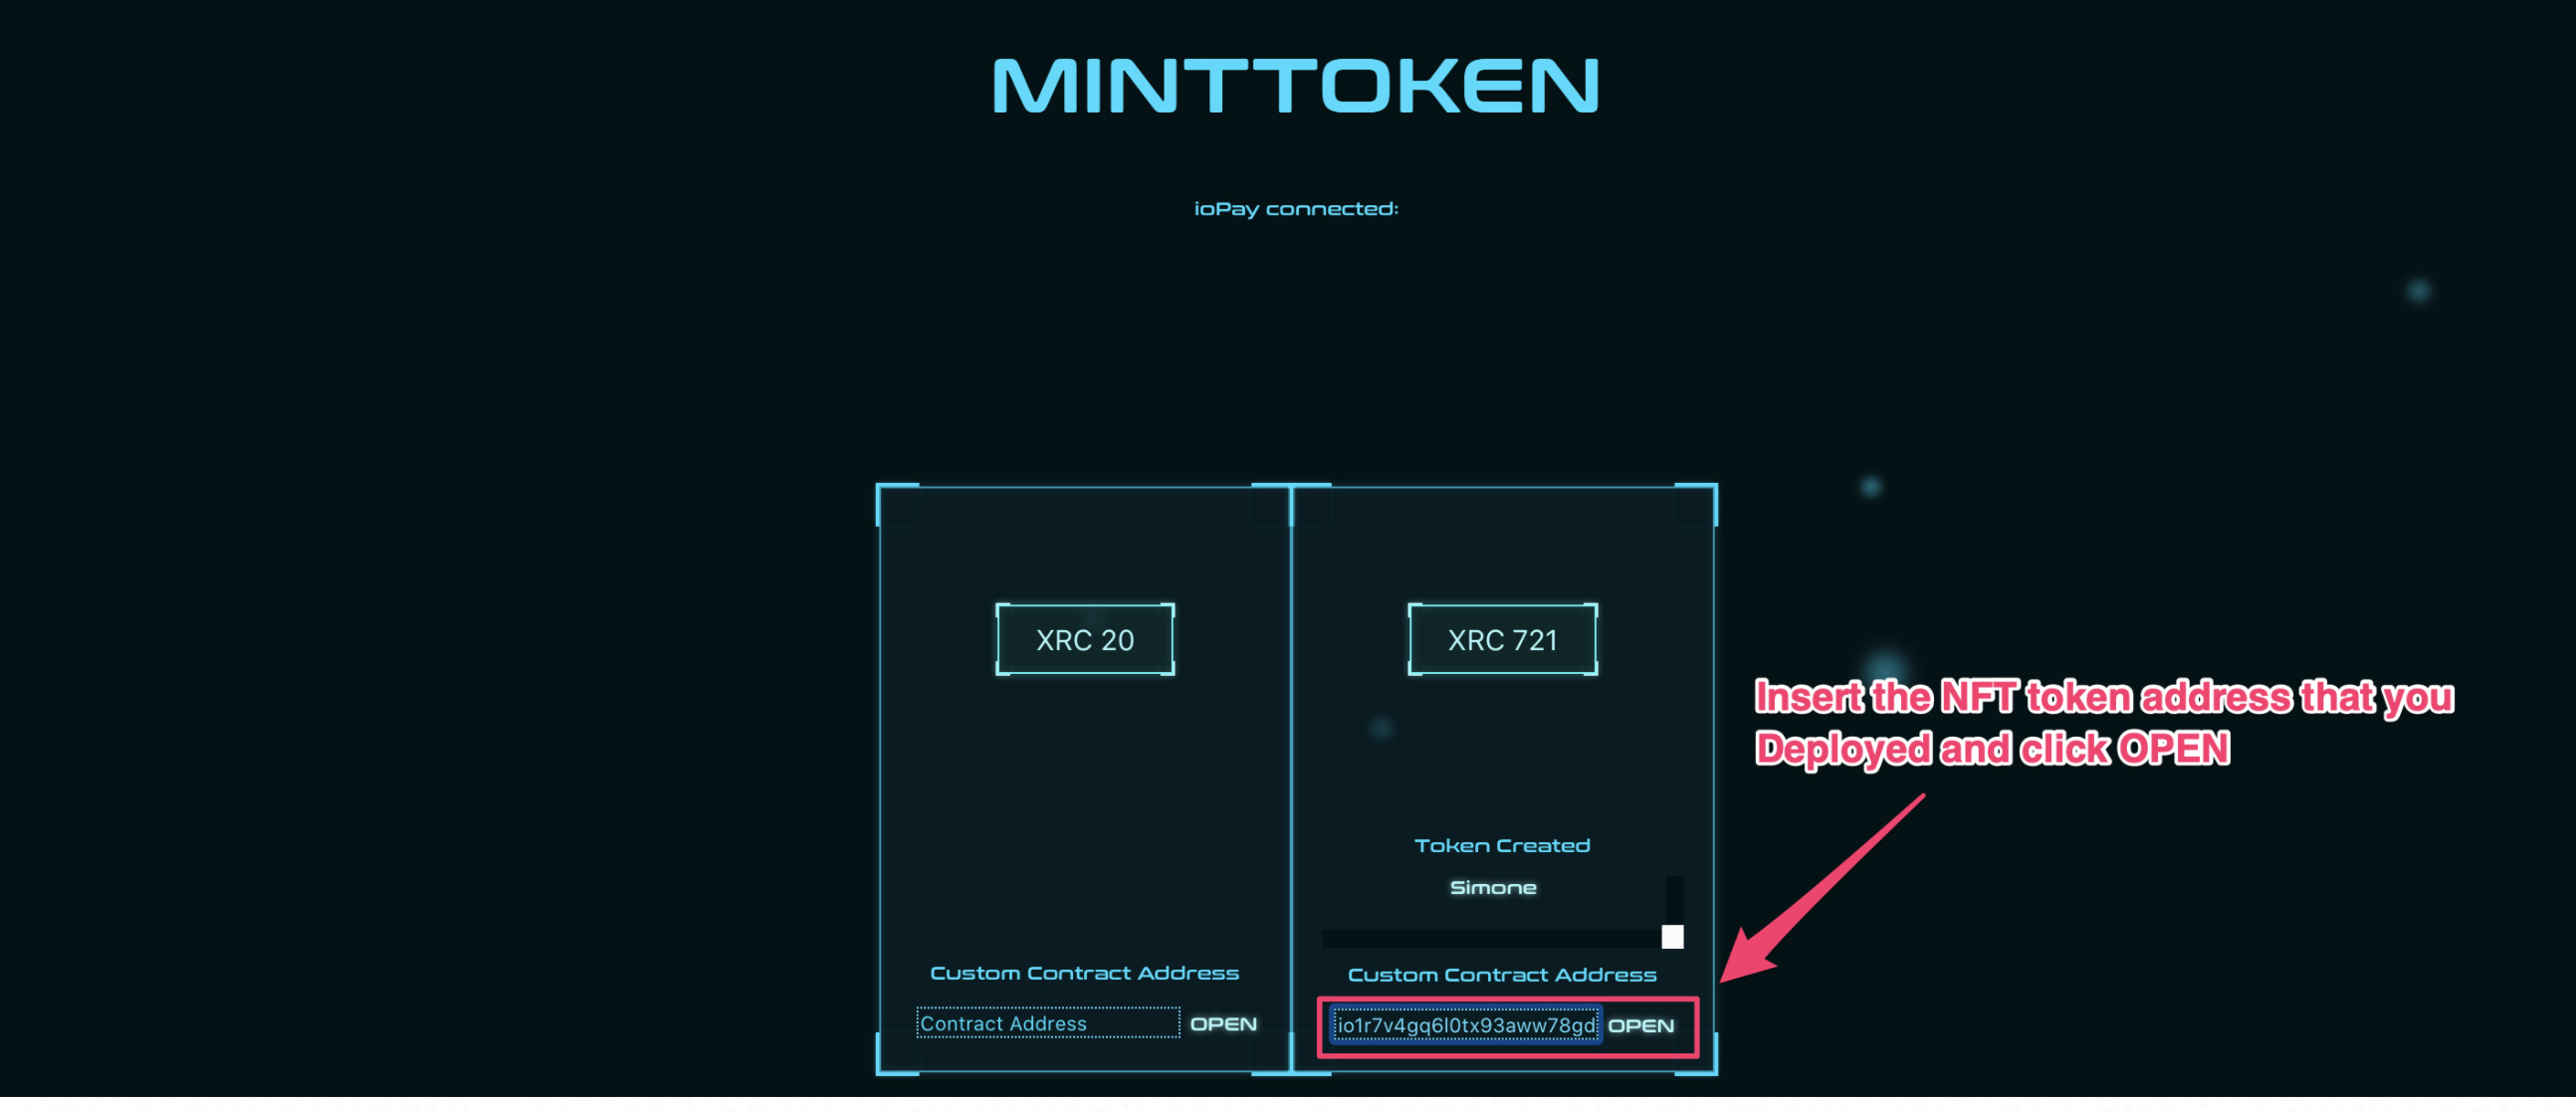
5. Mint your NFT tokens
Once the NFT token contract has been deployed, you can start minting your unique NFT tokens! The NFT token contract you just generated will allow you to generate as many NFT tokens by defining a Name, Description and Data File (optional) . Let’s see how the minting works:
a) Open https://minttoken.io and paste your NFT token contract address from iotexscan.io in the Custom contract Address field, then click " OPEN ":
b) In the following screen, fill in the required details for the NFT token you want to mint:
- Token Contract address: this is again the contract address for your NFT token, you cannot change it but you may want to store it for future reference!
- Token name : set a unique name for this unique NFT token. In our example, we imagine it represents a magic weapon in game called Thunderfury Blessed Sword.
- Token description : This field can be used for any text you want to associate to this token, we used it to describe the powers of our Thunderfury sword.
- Data File : In this field you can drop any file that represents or is related to this NFT, in our case we used a nice picture showing our sword.
- IPFS File hash: take note of the “image” data field at the bottom - this is the IPFS hash of your file that will identify this NFT along with its Name and Description. Anyone can view this file from IPFS at any time after you mint the NFT.
- Recipient address: You can set any IoTeX address where you want to send your new NFT, or you can leave it empty to send it to yourself.
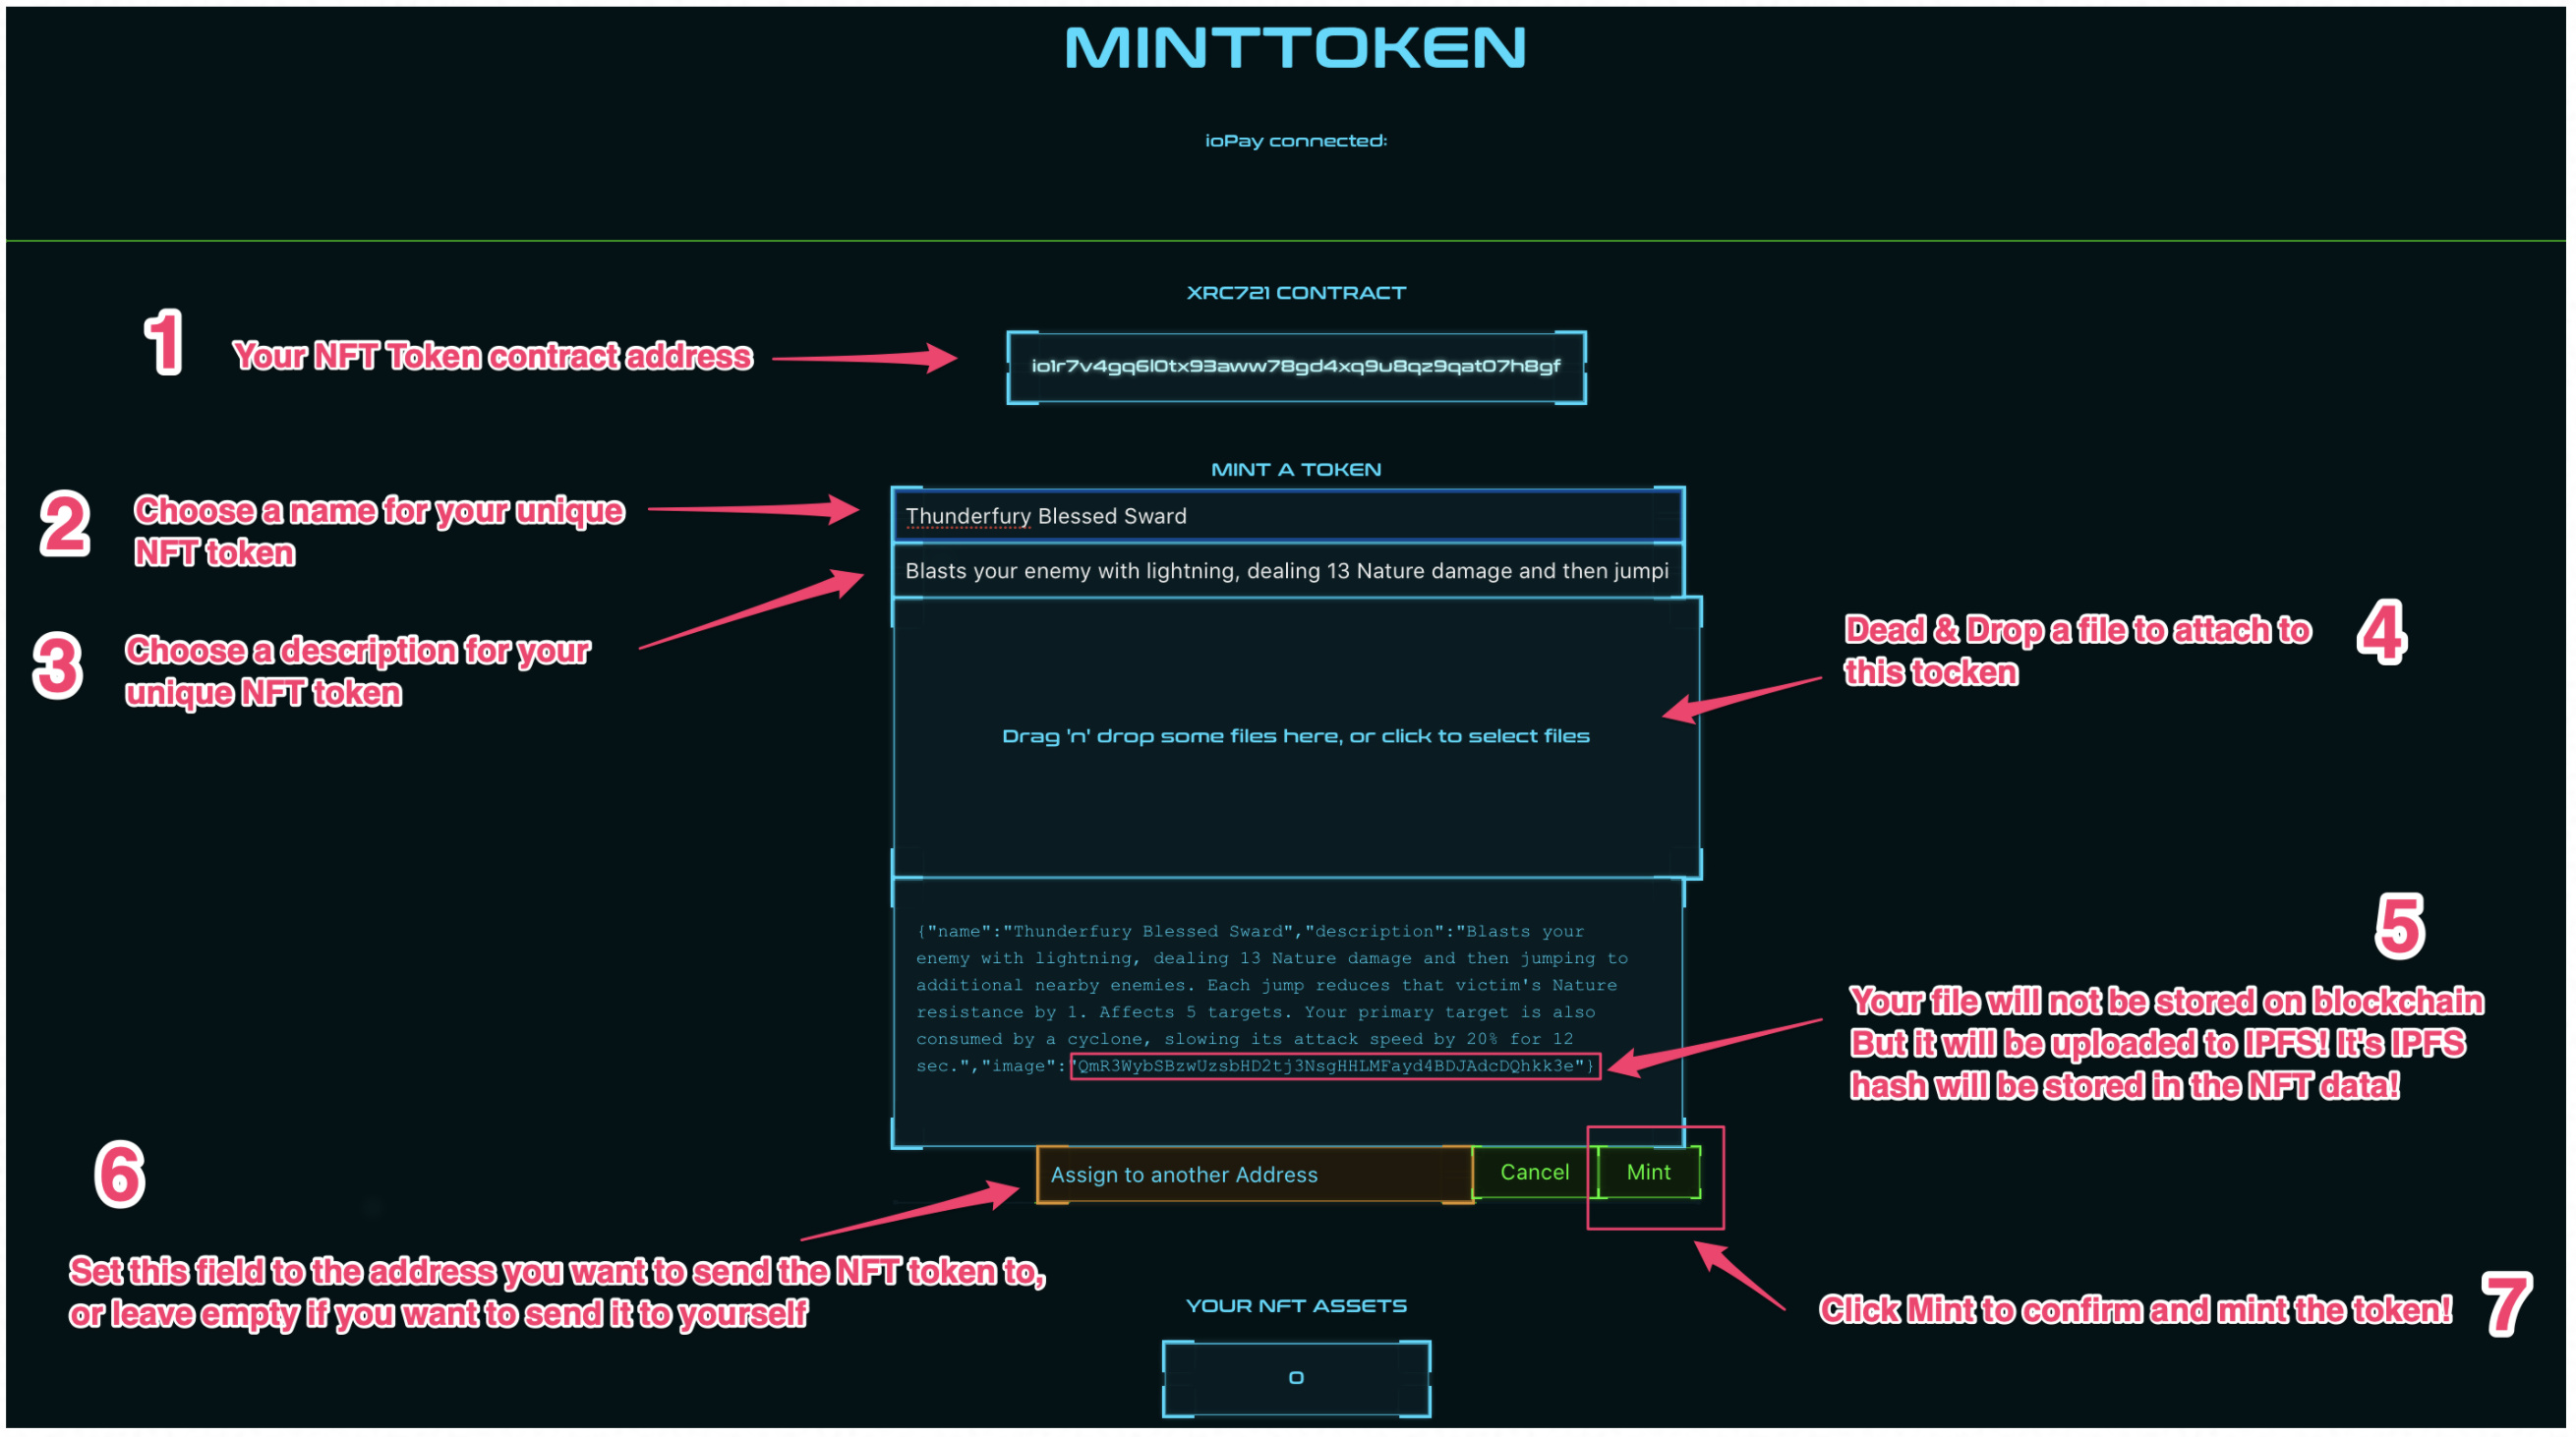
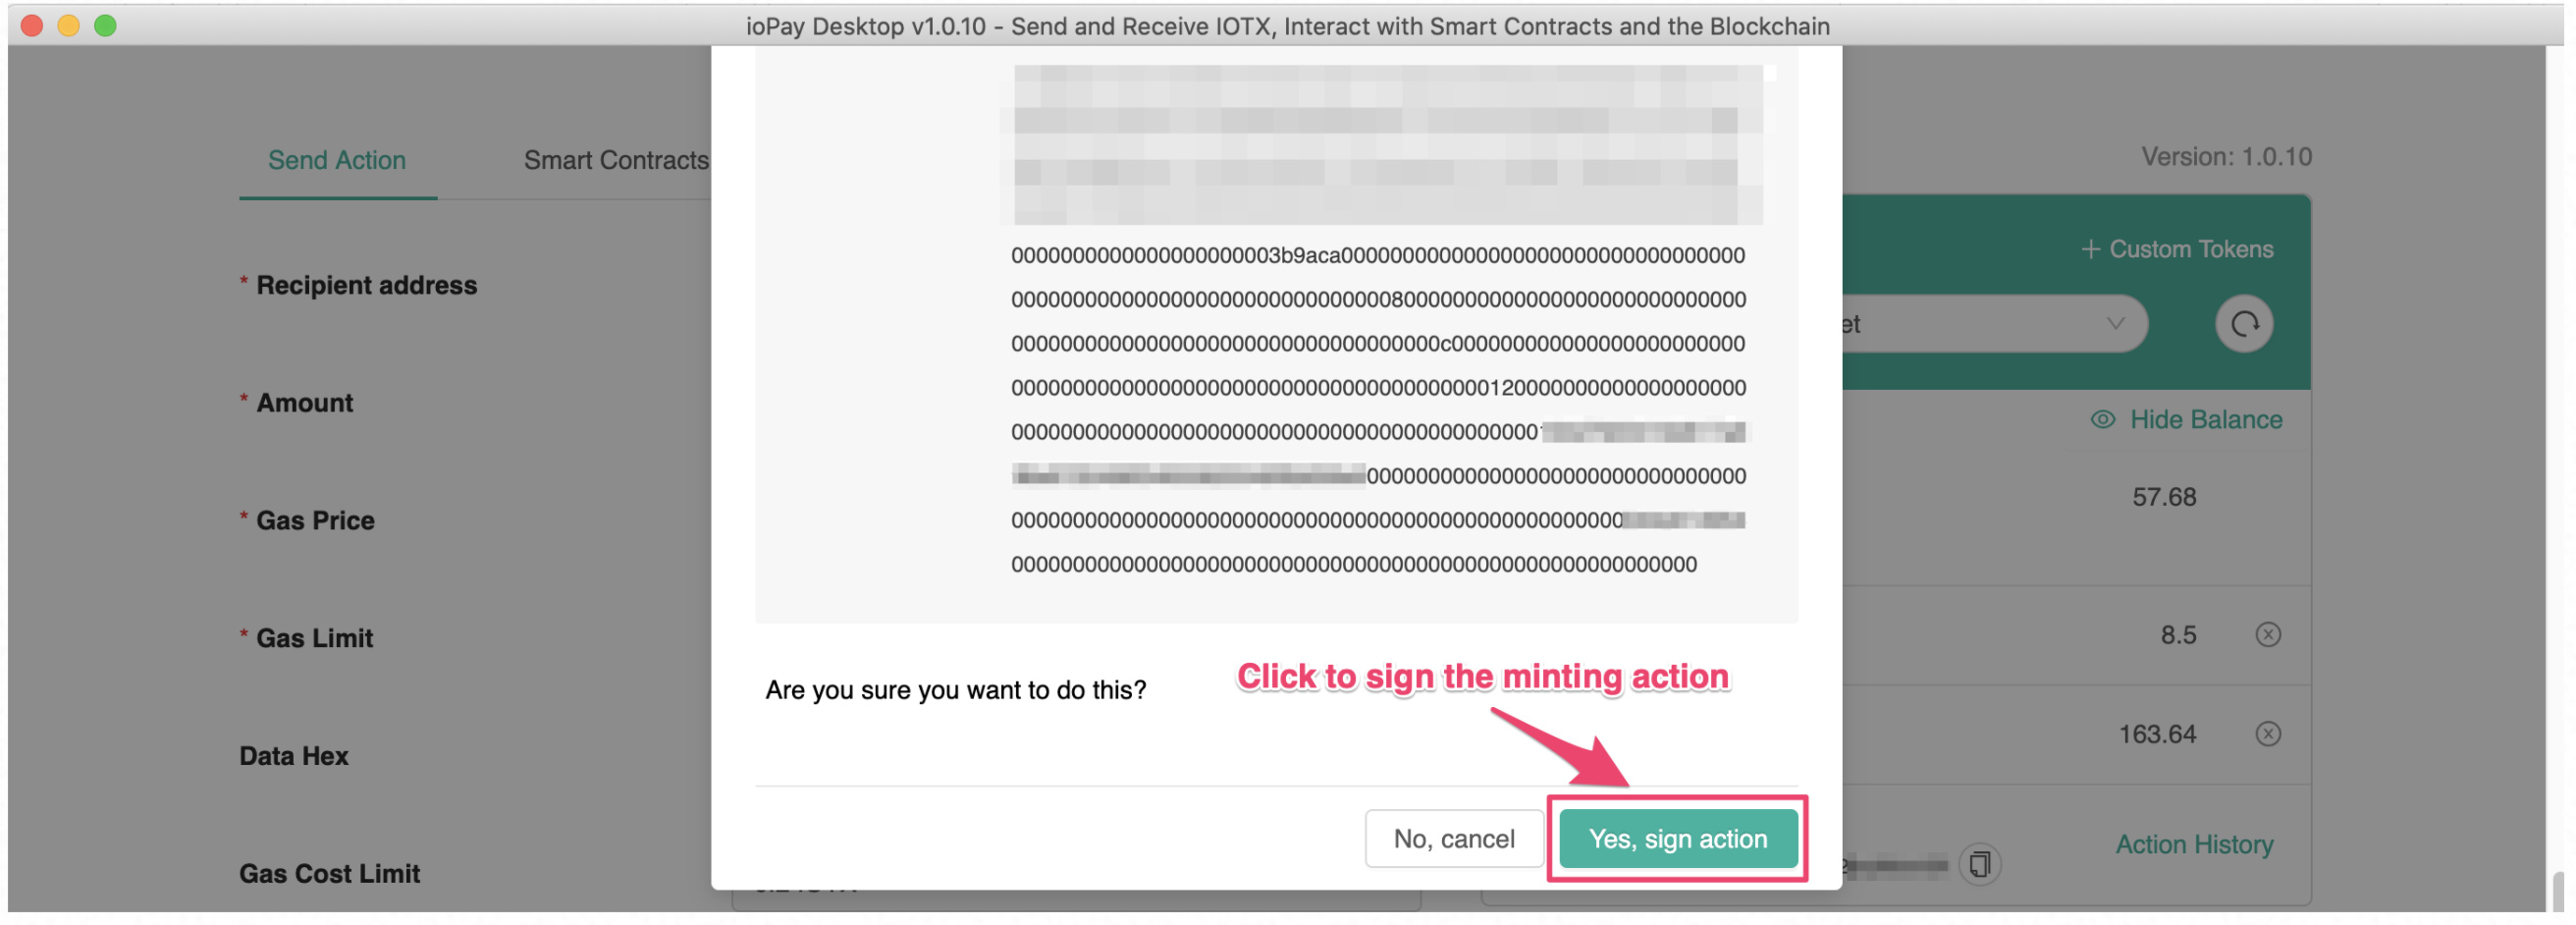
c) When you have completed the steps above, click MINT. Your ioPay wallet will display a request to sign the minting action: scroll down and click the sign button. You will receive an action hash once your action is broadcast to the blockchain.
6. Add your NFT to ioPay
a) In ioPay Wallet, click “Custom Token” to add your token to ioPay, and paste the NFT token contract address that you found in Step 3:
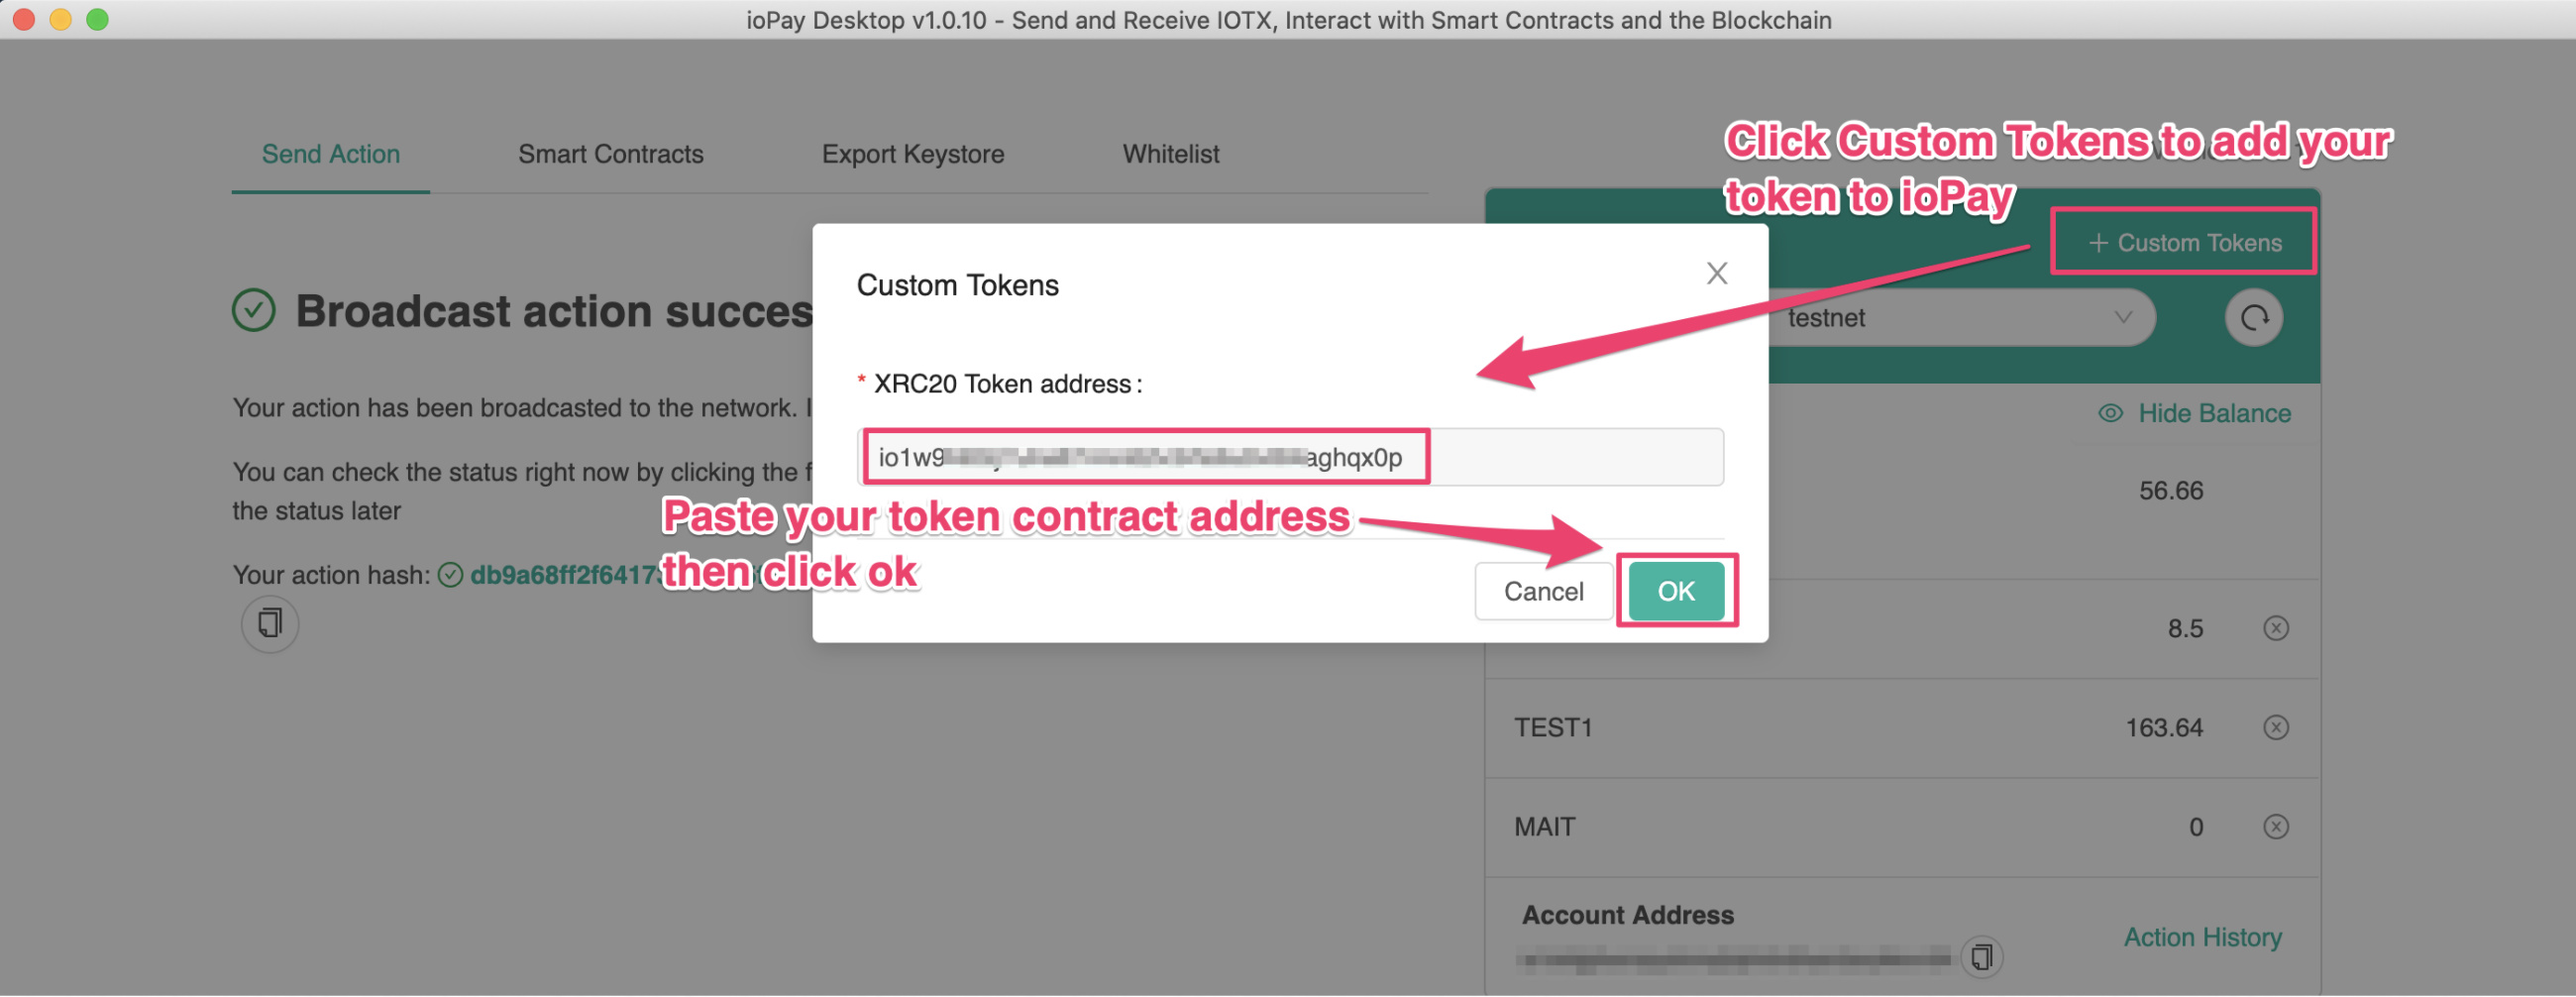
b) Click OK to confirm, then verify that your NFT token has been added to ioPay and that the balance for the token equals 1 - that is the single NFT token that you just minted and sent to yourself!
Questions?
For any questions, please contact an Admin in the IoTeX Telegram Group. Stay tuned for more advanced token creation tutorials!
